In a nutshell
- 🧪 A two-ingredient peel-off mask made with unflavoured gelatin and milk lifts blackheads gently, using a flexible film that grips debris without harsh tugging.
- 📏 Recipe: mix 1 tbsp gelatin (9–10 g) with 1.5–2 tbsp milk (22–30 ml), heat 10–15 seconds, then cool to warm; milk’s lactic acid softens dead skin for cleaner removal.
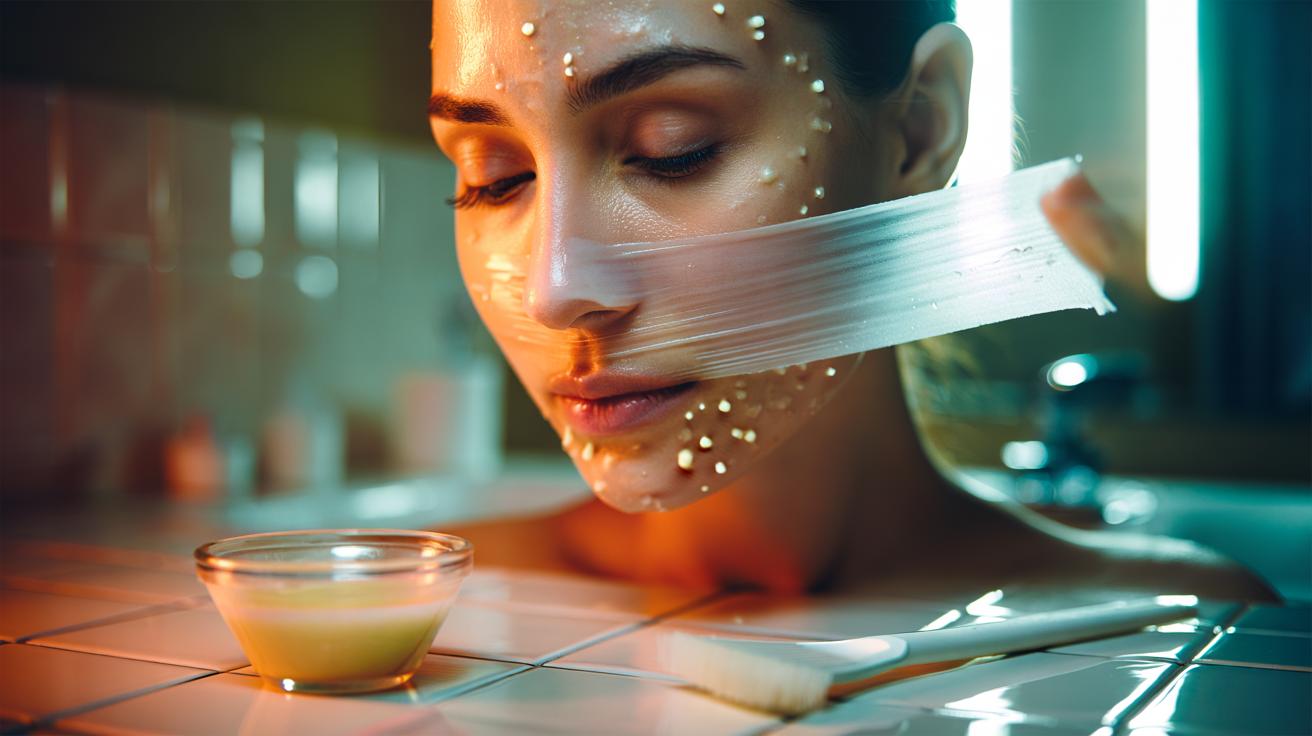
- 🧭 Application: cleanse, optionally warm-compress, dry thoroughly, apply a medium layer to the T‑zone, avoid hair/eyes; dry 15–20 minutes, peel low and slow, then moisturise; use 1–2× weekly.
- ⚠️ Safety: skip during eczema, rosacea flares, sunburn, or open blemishes; patch test if sensitive; space from retinoids/AHAs/BHAs/BPO; keep tools clean; vegan? choose clay or hydrocolloid alternatives.
- 💷 Results & value: costs pennies per session, fits curves better than many strips, clears oxidised plugs but not closed comedones; maintain with BHA toner or niacinamide on off days.
Blackheads can dull the complexion and stubbornly resist daily cleansing, yet an at-home fix can be both simple and satisfying. Enter the two-ingredient gelatin peel-off mask—a kitchen-cupboard remedy that clings to clogged pores and lifts debris as it sets. Using unflavoured gelatin and milk, it forms a flexible film that adheres to sebum plugs without yanking at healthy skin. This method is quick, low-cost, and designed to feel gentle while it works. The result is a smoother nose, chin, and T‑zone with minimal faff. Below, you’ll find the science, the exact measurements, and the step-by-step routine to make the mask perform at its best.
Why Gelatin Works on Blackheads
Blackheads form when sebum and dead skin accumulate in a pore, oxidising at the surface to turn dark. When warmed and dissolved, gelatin cools into a slightly elastic film that grips this debris. As you peel, the film tugs the oxidised plug from the pore’s opening, leaving skin clearer to the eye and smoother to the touch. Because the bond is flexible rather than brittle, many users report less sting than with harsher strip adhesives. Meanwhile, milk provides fluidity and comfort.
Milk is useful for more than texture. It contains lactic acid, a gentle alpha-hydroxy acid that helps soften the top layer of dead cells, allowing the film to lift out grime more efficiently. The mix also balances glide and grip: enough adhesion to catch pore gunk, but not so much that it rips at delicate areas. Used correctly, the mask targets buildup while respecting the skin barrier.
The 2-Ingredient Recipe: What You Need and Why
The beauty of this mask is its economy: two pantry staples, measured precisely, deliver consistent results. Choose plain, unflavoured gelatin—scented or coloured dessert mixes are unsuitable—and whole or semi-skimmed milk. The fat and protein in milk add comfort, while its mild acidity supports exfoliation. Accuracy matters: too little milk and the film becomes brittle; too much and it won’t grip. The ratios below make enough for the nose and chin; double if treating the full T‑zone.
| Ingredient | Amount | Function | Notes |
|---|---|---|---|
| Unflavoured gelatin | 1 level tablespoon (about 9–10 g) | Creates peelable film; adheres to debris | Check it’s plain; avoid sweetened/coloured mixes |
| Milk | 1.5–2 tablespoons (22–30 ml) | Softens skin; adds slip; mild lactic acid action | Plant milks lack lactic acid and set less reliably |
In a heat-safe bowl, combine the gelatin and milk, stirring until no dry pockets remain. Microwave for 10–15 seconds (or use a bain-marie) until the mixture liquefies. Allow it to cool to warm—comfortable to the touch—before applying to avoid irritation.
Step-by-Step Application for Best Results
Start with a freshly cleansed face. A quick, steamy shower or a warm flannel compress for one minute can help loosen pore contents. Dry thoroughly; moisture prevents proper adhesion. Using a clean brush or spatula, spread a medium-thick layer across targeted areas—typically nose, sides of nose, chin, and between the brows. Avoid eyebrows, hairline, lips, and delicate under-eyes to prevent unwanted tugging on hair or thin skin. Aim for even coverage without thin, patchy edges that tear on peeling.
Let the mask dry for 15–20 minutes. You’ll feel it tighten as it sets. Test at the edge: if it lifts cleanly, you’re ready. Peel slowly from the outer edges inwards, keeping the strip low and parallel to the skin to encourage clean release. Rinse away any residue with lukewarm water, then pat dry. Follow with a calming hydrator—think fragrance-free moisturiser or aloe gel. Limit use to once or twice a week to avoid over-exfoliation and to keep the skin barrier resilient.
Safety, Sensitivity, and When to Skip It
Though gentle by design, peel-off formats aren’t right for everyone. If you have active eczema, rosacea flares, sunburn, or open blemishes, skip this until your skin settles. Those using potent actives—retinoids, strong AHAs/BHAs, benzoyl peroxide—should patch test first and space treatments to prevent compounding irritation. Perform a patch test on the jawline 24 hours beforehand if you have sensitive or reactive skin. If stinging or redness persists beyond a few minutes after removal, discontinue.
Hygiene matters: prepare the mixture in a clean vessel and use a washed brush to prevent contamination. Gelatin is animal-derived; if you prefer a vegan route, opt for a clay or hydrocolloid-based alternative rather than trying to substitute the gelling agent here, as most plant gels don’t achieve the same peel strength. Finally, remember that a peel-off mask is a maintenance tool, not a cure. Pair it with regular cleansing and non-comedogenic skincare to minimise future buildup.
Cost and Results: How It Compares With Store-Bought Masks
A big draw is value. A box of gelatin and a bottle of milk yields numerous treatments for a fraction of the price of branded strips. Per session, you’re often spending pennies rather than pounds, while keeping control over freshness and strength. In practice, results are comparable to many peel-off strips: you’ll see the tiny “spikes” of extracted plugs on the film, especially from the nose. Because the film flexes, it can hug curves better than rigid strips, improving contact.
That said, manage expectations. The mask removes oxidised surface plugs and some deeper debris, but it won’t eradicate closed comedones or treat hormonal congestion. Consistency counts: use once weekly alongside a mild BHA toner or a niacinamide serum on off days to maintain clarity. If you prefer a more targeted approach, reserve the mask for blackhead-prone zones and keep the rest of the face to soothing skincare only.
With thoughtful prep and precise ratios, the two-ingredient gelatin peel-off mask can become a smart, budget-friendly addition to your routine. It offers the tactile satisfaction of lifting away grime while staying kinder to skin than many aggressive strips. The key is restraint: apply only where needed, peel slowly, and restore moisture afterwards. Used this way, you’ll gain smoother texture and a clearer T‑zone without the sting or the spend. Will you try the recipe as is, or tailor it with a targeted routine to support your most blackhead-prone areas?
Did you like it?4.3/5 (26)