In a nutshell
- 🥚 The water bottle method uses a gentle squeeze-and-release to create suction that lifts the yolk and leaves egg whites behind, leveraging basic pressure, viscosity, and surface tension.
- 🧪 Chill eggs, crack into a shallow bowl, align the bottle mouth to the yolk, then release slowly; wipe the rim between eggs and drop yolks into a separate bowl—even a speck of yolk will ruin meringue.
- 🧼 Prioritise hygiene: use a clean, odour-free bottle and grease-free bowls; choose Lion Mark eggs; store whites sealed for up to 2 days in the fridge or 3 months frozen; keep yolks under water and use within 24 hours.
- 🍼 Pick the right kit: a 500 ml soft PET bottle with a narrow mouth gives control; avoid rigid glass; select fresh Grade A eggs, separate while cold, then bring whites to room temperature before whipping.
- 🍰 The payoff is precision—cleaner workflow, faster whipping, and stable peaks for meringue, macarons, and soufflé, saving time, ingredients, and stress.
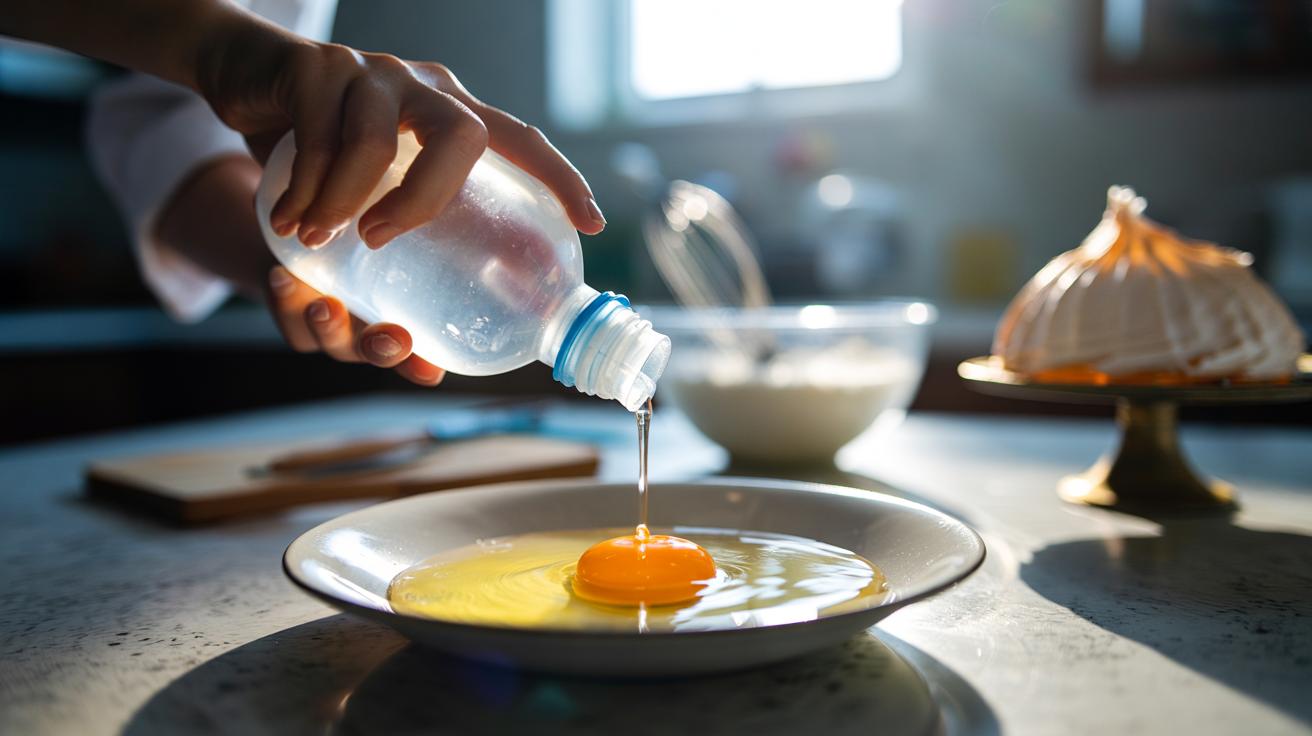
In busy British kitchens, simplicity can be the finest luxury. Enter the viral trick that lets you separate egg whites using nothing more than a clean water bottle. No yolk on your fingers. No jagged shell shards. Just a quick squeeze, a clean lift, and a bowl ready for pavlova dreams. It looks like wizardry on social media, yet it rests on dependable food science and a splash of common sense. The real magic is control. With a soft plastic bottle, you regulate pressure and precision, turning a fiddly job into a neat, repeatable habit that helps your bakes behave.
Why a Plastic Bottle Works
The bottle trick is a neat collision of kitchen physics and practical design. A gentle squeeze pushes air out; releasing the squeeze creates a small vacuum that pulls the yolk into the opening while leaving the slippery egg white behind. That’s because whites are less viscous and slide away readily, while an intact yolk membrane forms a resilient orb that can be lifted without tearing. It’s not magic; it’s pressure, viscosity, and surface tension playing in your favour. Choose a flexible PET water bottle, ideally 500 ml, which offers enough squeeze without crushing the yolk.
Fresh eggs matter. The albumen of a fresh egg is thicker, so the white sits higher and is easier to decant cleanly. Older eggs thin out, and that makes the boundary between white and yolk less distinct. A shallow bowl increases visibility and access, too. Hold the bottle upright, not at an aggressive angle, and ease the mouth towards the yolk like a hover-landing—calm and deliberate. The lighter the squeeze, the cleaner the lift. Over-squeezing blasts air and can rupture the yolk, undoing your hard work in a foamy second.
Good mise en place is half the job. Crack each egg into a small bowl first, then transfer the separated white into a clean mixing bowl at once. That way, if a yolk breaks, you sacrifice one egg, not the entire batch. This measured approach keeps your meringue, macarons, or soufflé base pristine, with no fat contamination. Think of it as strategic patience that saves ingredients, time, and temper.
Step-By-Step: The Bottle Squeeze Method
Start cold. Chilled eggs separate more predictably because the yolk firms up and the white stays cohesive. Crack the egg onto a flat surface, then slide it into a shallow bowl to spread the white thinly. Take a clean, odour-free plastic bottle, squeeze it gently to expel air, and bring the mouth to the yolk. Release pressure slowly and let the yolk rise into the bottle. No jabbing. No panic. The white will slough away, leaving you with a neat, glossy sphere captured at the neck.
To release, hover the bottle over a second bowl and squeeze softly until the yolk drops intact. If a yolk breaks during capture, don’t force it. Stop, reset, and try another egg; a trace of yolk in the whites undermines foam. Even a dot of yolk will ruin a good meringue. Wipe the bottle mouth between eggs to avoid residue. Work in small batches and keep a clean cloth nearby for confidence and speed. This system scales easily when you need six or more whites for a towering pavlova.
Troubleshooting is straightforward. If the yolk won’t lift, you’re squeezing too hard or aiming at the white instead of the yolk. If the yolk slips back, tilt less, steady your hand, and reduce pressure. For ultra-fresh eggs with very firm whites, nudge the white aside with the bottle edge before lifting. Seasoned bakers keep a spare bottle to hand and rotate them, ensuring a consistently crisp seal and reliable suction on every egg.
Hygiene, Safety, and Recipe Success
Clean kit equals clean flavours. Use a dedicated bottle that’s washed in hot, soapy water and air-dried thoroughly. Avoid bottles that previously held flavoured drinks—odours cling. In the UK, Lion Mark eggs are produced to high safety standards, yet raw egg handling still demands care. Keep hands, bowls, and tools grease-free. Fat sabotages foam, so ensure your whisk and mixing bowl are squeaky-clean; a quick wipe with lemon juice or vinegar neutralises hidden residues and primes a glorious whip.
Food safety is practical, not fussy. Store separated egg whites in a sealed container in the fridge and use within two days, or freeze for up to three months. Label the number of whites to keep recipes on track. Yolks can enrich custards, curds, or pasta dough; cover them with a splash of water, refrigerate, and use within 24 hours. Waste less, bake more. When you plan multiple bakes, this bottle method cuts mess and downtime, tightening your workflow and freeing attention for flavour and texture.
Performance in the bowl is the end goal. Whites with zero yolk whip faster, hold more air, and form stable peaks, whether you’re chasing satin meringue, feather-light angel food cake, or a slick whiskey sour. Precision pays. By removing human variability—slippery fingers, jagged shell edges—the bottle becomes a tiny, hand-held insurance policy for consistency. That confidence reads in the crumb and crackle of your finished bake, where structure and shine sing together.
Choosing the Right Bottle and Eggs
Not all bottles are equal. A soft, springy wall provides control; a stiff wall provides frustration. Look for a narrow mouth that seals neatly around the yolk without engulfing the white. The right bottle turns technique into muscle memory. Pair that with eggs that suit your recipe: fresh for clean separation, medium to large for predictable ratios, and free-range for flavour. Below is a quick guide to help you match bottle to task and choose the best eggs for your bake.
| Bottle Type | Pros | Cons | Best For |
|---|---|---|---|
| 500 ml soft PET | Great control; light squeeze; easy seal | Can deform if over-squeezed | Everyday separating; small batches |
| 1 litre PET | Stable grip; slower release | Less precise near bowl edges | Large batches; bigger yolks |
| Silicone sports bottle | Very responsive; durable | Wide mouth may grab whites | Quick, repeated separations |
| Glass bottle | Odour-free | Too rigid; poor suction control | Not recommended |
As for eggs, aim for Grade A, chilled, then separate straight from the fridge. Let whites warm to room temperature before whipping for superior volume and stability. Freshness delivers cleaner boundaries; older eggs are fine for omelettes but fussier for meringue. When shopping, a quick check of dates and shells pays off. Smooth shells, no cracks, no dryness. Better inputs, better outcomes. That’s the unimpeachable law of good baking, whether you’re crafting dainty macarons or a cloud-light roulade.
This small hack has outsized impact. A humble bottle turns a messy task into a tidy ritual, protecting your foam, your timing, and your patience. It’s quick, cheap, and delightfully teachable—perfect for weekend projects or weeknight puddings. Egg whites stay pure, yolks remain useful, and your recipes gain a new level of reliability that shows in every glossy peak. Will you give the bottle method a place in your toolkit, and if so, which bake will you test first: pavlova, macarons, or a dangerously silky mousse?
Did you like it?4.6/5 (29)