In a nutshell
- 🍪 The 3-finger measuring rule uses your index, middle, and ring fingers as a built-in gauge for cookie diameter, delivering uniform portions without a scale.
- ✋ Practical method: fingers set size, a three-finger gap guides tray spacing, and a knuckle press controls thickness; run a quick calibration test to match your dough’s spread.
- ⏱️ Consistency boosts results: expect an even bake, predictable times, reliable yields, and neater decoration for glazing, drizzling, and sandwiching.
- 🎯 Adapt by style: two fingers for crisp snaps, three for balanced chew, four for chunk-heavy or stuffed cookies; adjust press depth to fine-tune spread.
- 📏 Handy reference: finger gauges map to approx. diameters (2 fingers ≈ 3.5–4 cm; 3 ≈ 4.5–6 cm; 4 ≈ 6–7 cm) and matching spacing for consistent results.
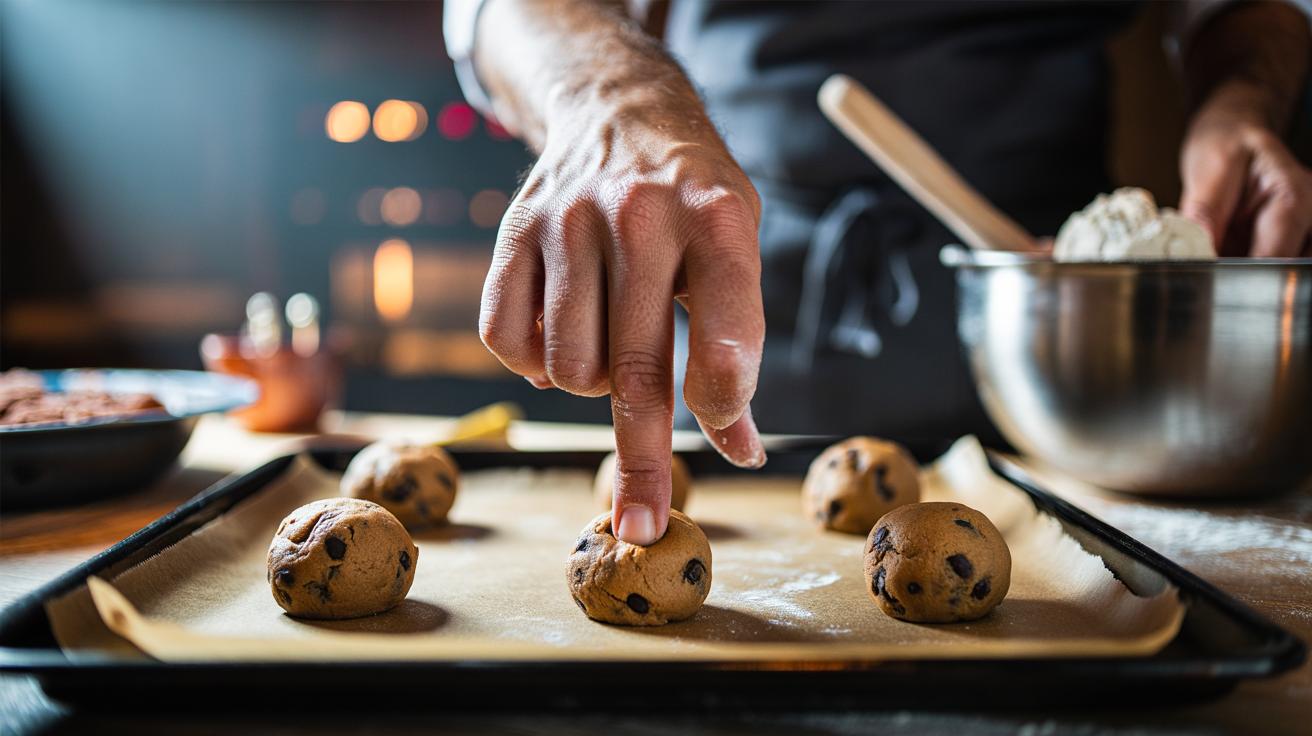
Ask a room of bakers how they get identical cookies without a gadget, and many will tap their hands: the 3-finger measuring rule. It’s a tactile, repeatable cue that lets you portion cookie dough swiftly and evenly without a scale. By using the natural width and joints of your fingers, you can match the size, thickness, and spacing of each portion with surprising precision. The method is fast, clean, and portable—ideal when you’re baking at home or scaling up for a crowd. Here’s how professionals translate hand geometry into consistent results, along with a few simple tweaks for different doughs and styles.
What Is the 3-Finger Measuring Rule?
The 3-finger rule uses the width of your index, middle, and ring fingers held together as a built‑in gauge for cookie portions. Place those three fingers side by side, then imagine that width as the diameter of your cookie dough ball. For many adults, that measurement sits around 4.5–6 cm, which—depending on the dough—maps to a classic biscuit‑tin size. Because your hands are always with you, the rule removes the need for a scoop or scale, and it scales seamlessly: two-finger width for mini biscuits, three for standard, four for bakery‑style large.
Professionals favour this method for speed, but also for consistency. Identical dough balls brown at the same rate, bake evenly, and finish together, preventing tray‑by‑tray guesswork. The rule extends beyond size: your first knuckle becomes a guide to thickness when pressing dough, and a three‑finger gap becomes a reliable spacing measure on the tray. Once your hands are “calibrated,” you create a repeatable system that works across recipes, from chocolate chip classics to ginger snaps.
How to Use Your Fingers to Portion Cookie Dough
Start with slightly chilled dough so it’s pliable but not sticky. Press your index, middle, and ring fingers together; that combined width is your target dough ball diameter. Pinch off dough and roll it until it visually matches that width. If you prefer smaller biscuits, use two fingers; for café‑style larges, move to four fingers. Place portions on a lined tray, leaving a three-finger gap between balls for even spread and airflow. Use your first knuckle as a pressing gauge: a half‑knuckle press yields thinner, crisper cookies; a light fingertip press preserves height for chewier centres.
For accuracy, do a quick one‑time calibration. Form one or two test balls using your 3‑finger diameter, bake them, and check the finished size and texture. Note whether the cookies spread too far (your dough was too warm or butter‑heavy) or too little (chill longer, or press more firmly). This micro‑test anchors the tactile measure to the specific dough you’re using, turning hand cues into a reliable house standard.
| Finger Gauge | Approx. Ball Diameter | Typical Outcome | Tray Spacing |
|---|---|---|---|
| 2 fingers | 3.5–4 cm | Bite‑size, crisper edges | 2–3 fingers |
| 3 fingers | 4.5–6 cm | Classic size, balanced chew | 3 fingers |
| 4 fingers | 6–7 cm | Large, bakery‑style | 3–4 fingers |
Why Consistent Portioning Matters
Even bake is the first win. Matching dough size means every cookie hits doneness together, so you avoid undercooked centres or scorched edges lurking at the tray’s corners. Uniform portions regulate spread and moisture loss, locking in the intended texture—soft and chewy, or thin and snappy—without guesswork. That consistency also sharpens your baking times: once you know a 3‑finger ball bakes in, say, 11 minutes at 180°C, you can repeat that result across batches and ovens with minor tweaks.
There’s a cost and quality dividend, too. In professional settings, the yield per batch drives pricing, packing, and scheduling. The 3‑finger rule gives you predictable counts, less waste, and fewer re‑bakes. At home, it keeps the tin looking smart and prevents the last few biscuits from baking alone, which can dry them out. Finally, consistent sizing supports decoration: glazing, drizzling, or sandwiching works better when halves match, and icing lines look cleaner on uniform canvases.
Adjusting for Different Styles of Cookies
For chewy cookies (chocolate chip, oatmeal raisin), stick with the 3‑finger diameter and a gentle, quarter‑knuckle press to keep height. Chill the portioned balls briefly if your dough is warm; controlled spread preserves that bend‑in‑the-middle chew. For crisp or snap‑style biscuits (ginger snaps), drop to a two‑finger ball and give a half‑knuckle press for a thinner disc that bakes evenly edge‑to‑edge. If you’re making shortbread, press to a consistent thickness using your knuckle as a gauge across the surface, or roll between guides, then cut with a knife using your three fingers to space cuts.
Stuffed or chunk‑heavy doughs benefit from the four‑finger gauge to accommodate fillings and maintain structure. For crinkle cookies, use a two‑finger ball, roll in sugar, then lightly press so the top fissures nicely as it rises. If your dough spreads too far, reduce the press depth or chill longer; if it barely moves, warm it a touch or increase the press to half‑knuckle. The same hand cues translate across recipes, so once you learn your dough’s behaviour, minor finger‑based adjustments fine‑tune the finish.
Mastering the 3-finger measuring rule is about turning instinct into a system: fingers for diameter, knuckles for thickness, and a three‑finger gap for spacing. It’s quick, repeatable, and brilliantly adaptable, whether you’re baking a single tray or prepping for a fête. After a one‑tray test to calibrate your hands to your dough, the method becomes second nature and saves you from rummaging for scoops or scales. Ready to try it on your favourite recipe—will you start with a chewy classic at three fingers, a crisp two‑finger snap, or a four‑finger showstopper studded with chunks?
Did you like it?4.4/5 (20)