In a nutshell
- 🌱 Used tea leaves act as a gentle tonic, adding nitrogen, potassium, and micronutrients that boost soil life, structure, and moisture balance for richer blooms within weeks.
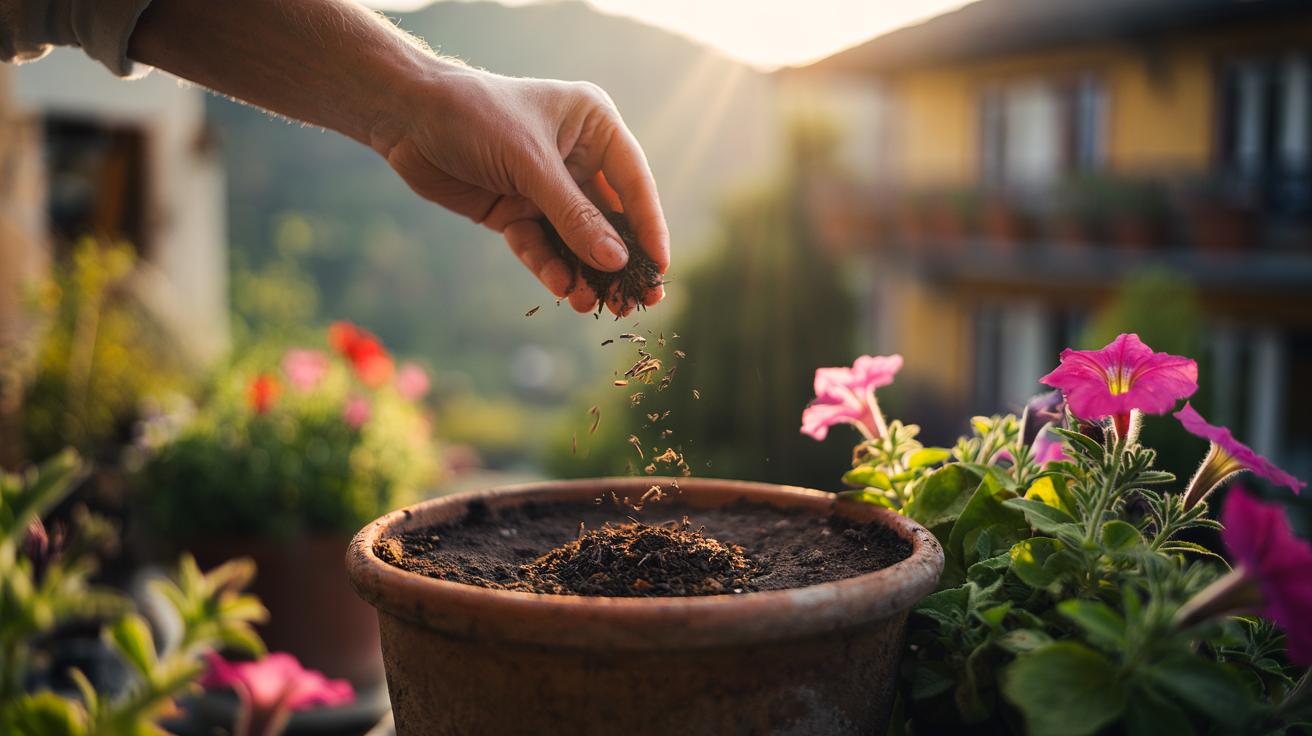
- 🫖 Apply thin layers (1–2 tbsp for a 15–18 cm pot), fork into the top 1 cm, water, and repeat every 2–3 weeks; avoid mats, flavoured teas, plastic bags, and any milky or sweetened tea.
- ⚖️ Tea nudges a slightly acidic pH, suiting azalea, camellia, and gardenia; use sparingly for alkaline lovers like lavender; caffeine in used leaves is negligible.
- ⏱️ In weeks 1–2 expect better infiltration and a healthy earthy scent; by weeks 3–4 see deeper greens, sturdier stems, and more buds—flush with water if you spot tip burn or tea stains.
- 🌿 For best results, pair tea with peat-free compost, occasional balanced fertiliser, and good light, watering, and airflow—moderation beats dumping for sustained container health.
Houseplants and patio pots respond brilliantly to small, thoughtful tweaks. One such tweak sits quietly in your kitchen caddy: used tea leaves. These papery fragments carry gentle nutrients, organic matter, and microbial starters that support soil life and improve structure. Results arrive fast. Often in weeks. Foliage colours deepen, watering becomes more forgiving, and blooms hold their form for longer. It is a low-cost, low-waste habit that dovetails with sustainable gardening. The key is knowing how to use tea correctly. Fresh versus used. Surface dressing versus composting. Quantity and timing. Get those right and your potted blooms will thank you with vigorous growth and steadier flowering cycles.
Why Tea Leaves Revive Tired Pots
Used tea leaves contain modest amounts of nitrogen, potassium, and trace phosphorus, alongside calcium, magnesium, and a suite of micronutrients. Think of them as a slow, soft tonic rather than a heavy fertiliser. The leaves break down, feeding soil microbes that in turn cycle nutrients to roots. This living bridge between organic matter and plant health is why tired potting mixes perk up after a couple of tea dressings. You also gain structure: the fibrous particles create tiny pores, improving aeration while retaining just enough moisture to buffer hot, dry spells.
Tannins in tea can nudge pH slightly acidic, helpful for azaleas, camellias, gardenias, and many compact bedding plants that prefer a mildly acidic root zone. It is a gentle nudge, not a plunge. Expect subtle corrections rather than dramatic swings. That’s ideal in containers, where extremes cause stress. Meanwhile, the faint caffeine residue in used leaves is typically negligible by the time they reach your soil, particularly if you brew strongly and discard the liquor. The priority is consistency: small amounts, applied at steady intervals, guide the soil community to stable productivity.
Quality matters. Plain black or green tea is best; avoid flavoured blends with oils, glitter, or added sugar. If your bags contain plastic mesh, open them and use only the leaves. Never bury tea deep where oxygen is scarce; shallow incorporation keeps decomposition aerobic and odour-free. Together these choices reduce the chance of mouldy clumps and deliver nutrients where roots can actually use them, right in the top five centimetres of the pot.
How to Apply Tea Leaves Safely
Start with used tea leaves, squeezed and cooled. Sprinkle a thin layer—about one to two tablespoons for a 15–18 cm pot—across the surface. Gently fork in the top centimetre, then water. That’s it. Repeat every two to three weeks during active growth. For larger tubs, scale proportionally. Do not heap tea in mats; thin layers decompose evenly and discourage fungus gnats. If you brew multiple cups daily, collect the leaves in an open tub, let them air-dry overnight, and apply in measured portions rather than dumping a wet mass all at once.
Green tea breaks down a touch faster; oolong and black provide slightly richer organic bulk. Herbal infusions vary wildly in composition: chamomile and nettle can be helpful, but fruit teas often contain sugars or oils that attract pests. When in doubt, compost mixed herbals first. You can also steep a weak “compost tea” by soaking used leaves in a litre of water for 12–24 hours, then straining and diluting 1:1 before watering. Never pour sweetened or milky tea onto pots; residues invite mould and ants.
| Material | Preparation | Quantity (15–18 cm pot) | Frequency | Notes |
|---|---|---|---|---|
| Used black tea | Cool, squeeze, fluff | 1–2 tbsp | Every 2–3 weeks | Fork into top 1 cm |
| Used green tea | Air-dry briefly | 1 tbsp | Every 2 weeks | Breaks down quickly |
| Compost tea (from leaves) | Soak 12–24 hrs, strain | 200 ml diluted 1:1 | Weekly in growth | Water onto damp soil |
Monitor and adapt. If leaves look pale, team tea with a balanced liquid feed once a month. If pots stay soggy, reduce tea quantity and improve drainage. Good husbandry—light, water, airflow—amplifies the subtle nutrition tea provides. Aim for harmony rather than heroics, and you’ll avoid the common pitfalls of overfeeding and anaerobic pockets.
What Changes to Expect in Weeks
Week one to two: soil texture feels softer, less crusty. Water infiltrates more evenly instead of skimming off the surface. You may notice micro-life returning—tiny springtails, a fresh earthy scent—signs of a functioning soil ecosystem. Healthy soils smell alive, not sour. Foliage often regains a light sheen as roots access a steadier trickle of nitrogen. Buds hold without dropping at the slightest draught. These are small, cumulative signals, but together they reveal a pot moving from survival to momentum.
Week three to four: leaf colour deepens from wan to confident green, particularly in bedding plants and compact shrubs. Flower stems thicken. Petal colours sharpen because potassium exchange improves. In many cases you’ll see more buds rather than larger individual flowers—a sign that energy budgeting has stabilised. If you notice leaf tip burn or a tea-like stain on the rim, you’ve applied too much; skip a cycle and flush the pot with clear water. Moderation remains the golden rule with any organic amendment.
By the second month, the benefits plateau into a steady rhythm. Pair tea leaves with monthly top-ups of peat-free compost and a light, balanced feed in peak bloom, and you create layers of support rather than a single-point fix. Remember that not all plants want the same acidity; for alkaline lovers like lavender, use tea sparingly and focus on grit and calcium. The aim is a resilient container that bounces back from heat, missed waterings, and heavy rain with minimal fuss.
Used tea leaves won’t replace every fertiliser on your shelf, but they offer a reliable, waste-cutting boost that complements sensible watering, decent light, and fresh compost. Results often arrive within weeks, then settle into a durable pattern of healthier leaves and steadier blooms. Simple, regular applications beat occasional, heroic dumps. That’s the quiet power of gentle nutrition in small spaces. Ready to trial a few pots, take notes for a month, and compare the difference in colour, bud count, and watering ease across your collection?
Did you like it?4.5/5 (26)