In a nutshell
- 🧴 A thin film of Vaseline delivers boundary lubrication, lowering friction and shear so shoes glide instead of rub, stopping blisters on day one.
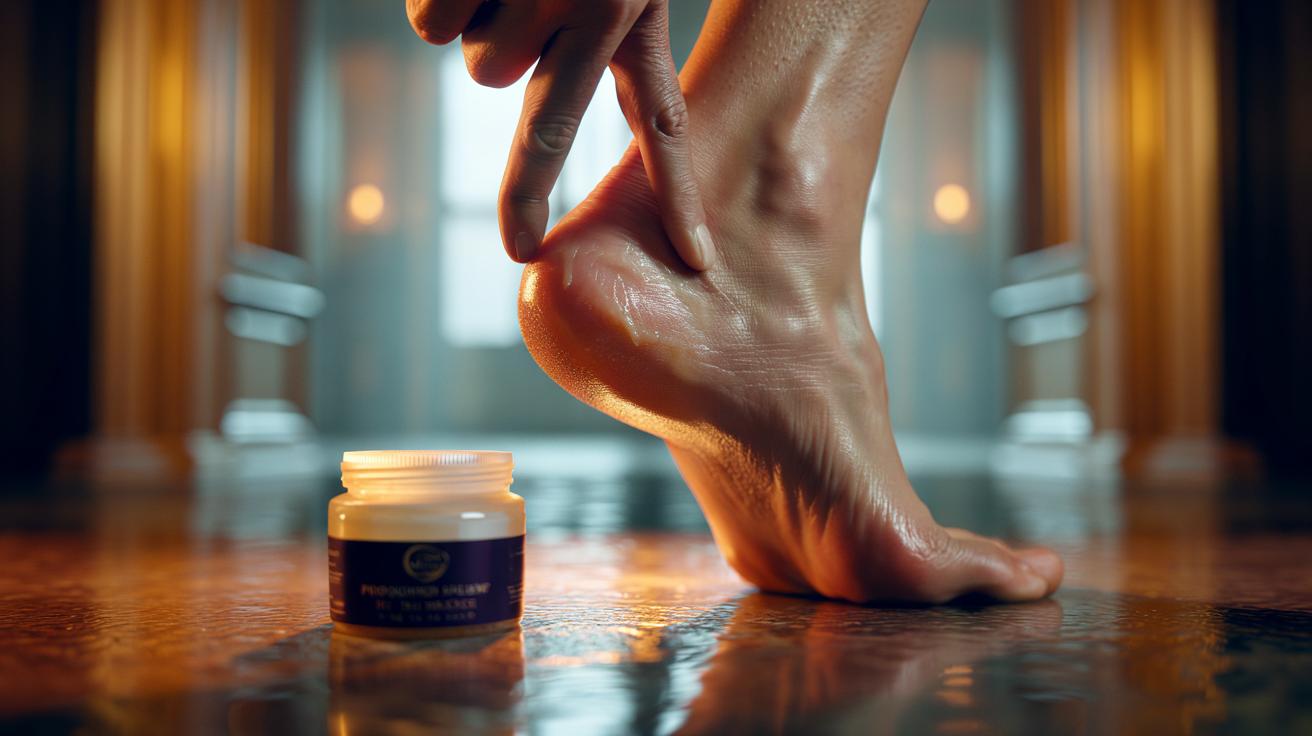
- 🦶 Application: clean, dry heels; pea-sized amount massaged into heel rim and Achilles; thin layer only, pair with moisture-wicking socks, and reapply at lunch if needed—avoid slick insoles.
- ⚠️ Use for stiff leather and first-wear events; skip for long, dusty hikes or intense sport; never apply to broken skin, and seek guidance if you have diabetes or neuropathy.
- 🧰 Alternatives: silicone anti-chafe sticks, waxy balms, night-before antiperspirant; for seam rub, add hydrocolloid/moleskin; upgrade fit with heel grips, tongue pads, or heel-lock lacing.
- 📅 Strategy: stage the break-in, use shoe trees, gently soften leather; combine lubrication + fit tweaks + planning to keep debuts comfortable and blister-free.
New shoes promise polish and posture, yet they often deliver a painful surprise: raw heels by lunchtime. A small, strategic smear of Vaseline on your heels can stop that story before it starts. By laying down a thin, flexible film, petroleum jelly creates a low-friction buffer that lets the shoe glide rather than grate. Apply it on day one and you’ll neutralise the harshest moments of the break‑in period. It’s cheap, portable, and fast. Most importantly, it works with both smart and casual footwear, from leather loafers to court shoes, giving your skin time to adapt without sacrifice.
How Vaseline Reduces Friction on Day One
Blisters form when repetitive shear forces separate skin layers. Vaseline interrupts that process by delivering boundary lubrication—a micro-thin film that lowers the coefficient of friction between heel and shoe. Instead of the lining grabbing skin with each step, the surfaces slide. This shift from sticking to gliding is what prevents “hotspots” from escalating. The film also distributes pressure more evenly, meaning isolated rub points become manageable micro-movements rather than skin-tearing tugs.
As feet warm and swell, shoes often clamp and chafe. Vaseline’s occlusive property slows moisture loss, so skin stays supple rather than tacky. Tackiness raises friction; suppleness reduces it. The jelly’s inert, waxy structure stays put through short commutes and office days, maintaining a consistent barrier in the very window when new shoes are at their stiffest.
Heat and humidity amplify friction, making summer debuts risky. A light application creates a stable interface that resists both heat-softened lining grab and sweat-induced stickiness. Use just enough to leave a satin sheen—heavy smears can feel slippery and attract grit. Done well, the film feels invisible but protective from the first pavement stride.
Step-By-Step Application and Dosage
Start with clean, dry heels. Identify likely rub zones: the back rim, the lateral heel, and the Achilles notch. Take a pea-sized dot of Vaseline on a fingertip and massage it into those areas until the shine dulls. Thin film, not a glob—you’re aiming for glide without residue. For shoes with narrow counters or stiff toplines, run a faint line around the collar’s contact path. If your toes also rub, add the smallest touch to little toe knuckles and the big toe’s medial side.
Let the film settle for a minute, then pull on socks. Choose tightly knit or moisture-wicking pairs, which partner well with lubrication by moving sweat away and preventing slippage. Reapply at lunch on day one if you walk far. With barefoot loafers or slingbacks, apply even more sparingly and test on a short outing first. Skip heavy application on glossy insoles—excess can make footbeds slick. If the shoe still bites, add a heel grip or tongue pad to improve hold while keeping the film in place.
Post-wear, wash feet with mild soap to remove residue and prevent dust build-up on socks. If any Vaseline touched leather, buff lightly; petroleum jelly can temporarily darken some finishes. Over the first week, keep the routine minimal but consistent. Small, precise layers outperform heavy coats and help the shoe conform to your foot without creating new problems.
When to Use It—And When to Skip It
Vaseline shines with stiff leather boots, loafers, and court shoes that rub at the heel collar. It’s a commuter’s friend when the distance is modest and the destination is a desk. It’s also a strong insurance policy for weddings, graduations, and first-day wear—those situations where a blister would derail the plan. Use it early, before any friction “hotspot” forms. Once skin is inflamed, you’re playing catch-up.
There are cases to avoid it. In long, dusty hikes or runs, grit sticks to grease and becomes abrasive. Sports footwear often benefits more from antiperspirant (to reduce sweat) or hydrocolloid patches that lock down skin. If you have diabetes, neuropathy, or poor circulation, protect skin with medical-grade dressings and seek professional guidance. Never apply petroleum jelly to broken or blistered skin; switch to sterile coverings and allow healing.
Quick reference for common shoes and strategy:
| Footwear | Use Vaseline? | Notes |
|---|---|---|
| Leather loafers/derbies | Yes | Thin film on heel rim; consider tongue pad for hold. |
| Heels/pumps | Yes | Target Achilles and sides; add heel grips if slipping. |
| Running shoes | Usually no | Prefer antiperspirant/socks; use jelly only for race-day hotspots. |
| Hiking boots | Sometimes | Short treks fine; avoid in gritty conditions. |
| Sandals | With care | Ultra-thin layer; test slippage risk. |
If slippage increases, reduce quantity or pivot to patches. The goal is control, not gloss. Keep the approach flexible, match it to the terrain, and your heels will thank you.
Alternatives, Upgrades, and Real-World Tips
Petroleum jelly is the budget classic, but alternatives exist. Solid anti-chafe sticks use silicone blends that feel drier while delivering similar glide. Balms with waxes add staying power in humid conditions. For sweat-heavy days, a swipe of aluminium-based antiperspirant on the heels the night before can cut moisture that fuels friction. If a shoe’s seam is the villain, park a hydrocolloid or moleskin patch on the skin and use a fraction of Vaseline around the edges to ease transitions. Match the tool to the trigger: slip, sweat, or seam.
Fit fixes compound the effect. Try a marathon lacing or heel-lock technique in trainers to pin the calcaneus. In smart shoes, a thin tongue pad can shift your foot back, reducing heel lift. Heel grips stop minor slippage without narrowing the toe box. Quality socks matter: dense, smooth weaves reduce friction; double-layer designs let fabric rub fabric, not skin. Rotate pairs so fibres rebound and maintain glide.
Build a micro break-in plan: one hour at home, then two hours, then a commute. Use shoe trees between wears to relax the counters. Gentle warming with your hand (not a hairdryer) can soften leather before the first outing. The smartest strategy is layered: a little lubrication, a small fit tweak, and a staged debut. That combination shortens the break-in curve while keeping your stride confident.
A tiny dab of Vaseline can transform the first-day experience, turning a risky debut into a non-event. By lowering friction and smoothing pressure points, you give both shoe and skin a calm, controlled introduction. Keep the film light, pair it with sensible socks, and adapt based on activity and terrain. If conditions change—dust, heat, marathon miles—switch to the tool that suits the job. Comfort isn’t luck; it’s a system. How will you combine lubrication, fit tweaks, and planning to make your next new-shoe day blister‑free from the first step?
Did you like it?4.5/5 (27)