In a nutshell
- 🥄 A 5-minute olive oil coating creates a light moisture barrier that smooths rough grain, reducing splintering and fine cracks for immediate comfort and safer edges.
- ⏱️ Step-by-step: clean and dry, optionally light sand (320–400 grit), apply a teaspoon of olive oil with the grain, then buff dry until non-greasy—ready to use the same day.
- 🧴 Safety & longevity: Olive oil is food-safe but may turn sticky or rancid if overused; for lasting protection, switch to food-grade mineral oil or a mineral oil + beeswax finish in thin coats.
- 🛡️ Care rules: Hand-wash only, never soak or use a dishwasher; dry immediately, store with airflow, and sand any snagging crack before re-oiling to stop it spreading.
- 📅 Maintenance & fixes: Do monthly top-ups or after heavy use; follow quick remedies—buff for dryness, sand + oil for splinters, and recondition sticky spoons with mineral oil + beeswax.
For home cooks, a battered wooden spoon tells a story of stews, sauces, and long evenings at the hob. Yet when the grain turns rough or a hairline crack appears, you can feel its days are numbered. There is a quick rescue hiding in your cupboard: a 5-minute olive oil coating that seals fibres, improves feel, and slows wear. Applied correctly, this simple treatment forms a light moisture barrier that curbs splintering and cushions against sudden drying. It’s not a workshop refinish; it’s a fast, practical fix that keeps a favourite utensil dependable. Use it as a stop-gap between deeper maintenance sessions to extend the life of your tools.
Why Olive Oil Works in a Pinch
Wood is a bundle of tiny capillaries. When it dries after washing, those channels shrink and raise the grain, leading to roughness, splintering, and fine cracks. A light coat of olive oil slips into the surface fibres, restoring suppleness and reducing friction. The oil’s viscosity helps it bridge micro-gaps so edges feel smooth again. While it doesn’t harden like specialist drying oils, it offers instant conditioning that improves grip and comfort. That quick replenishment is why a 5-minute treatment delivers such a noticeable difference.
Because olive oil is widely available and food-safe, it’s a realistic first-response option when a spoon starts to snag on a tea towel or your palm. It creates a temporary hydrophobic layer that slows water ingress during washing, which helps stabilise the wood and reduces swelling and shrinking cycles. Expect a softer sheen rather than a glossy finish, and note that deeper splits still need sanding or repair. Think of olive oil as a swift, low-cost stabiliser, not a permanent seal.
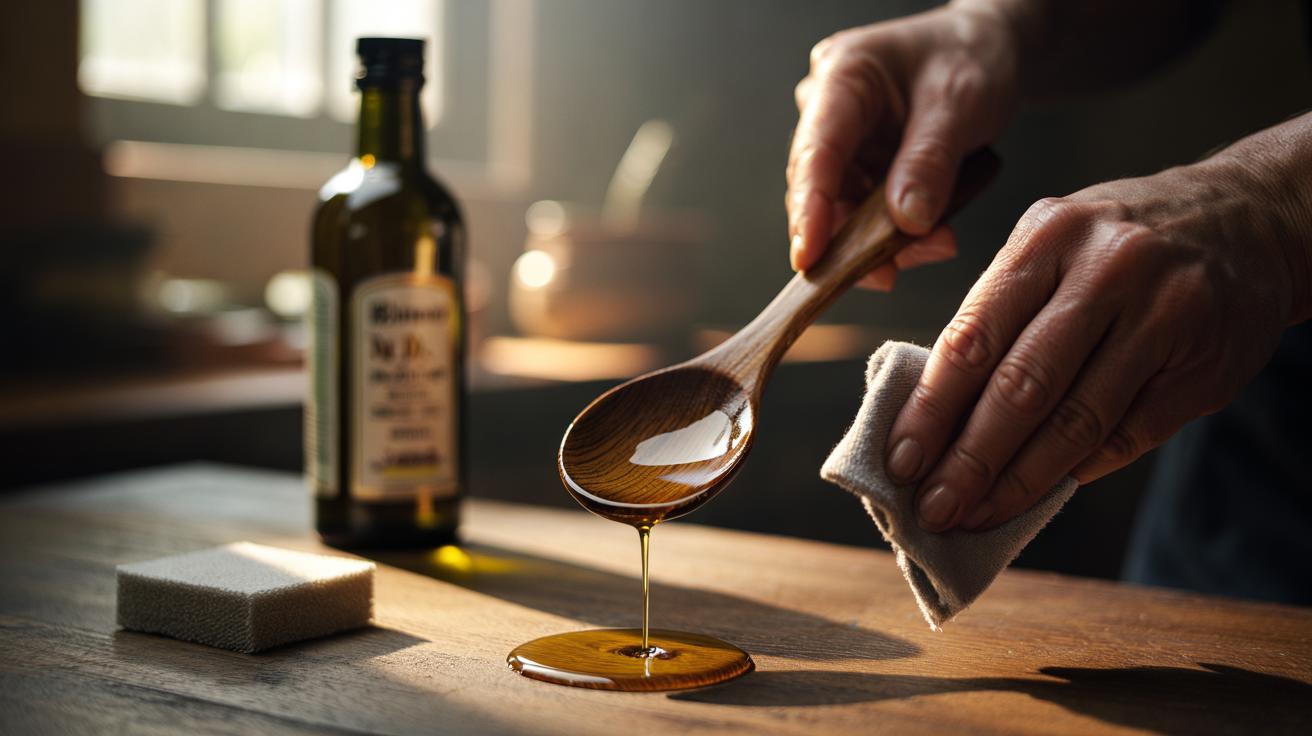
Step-by-Step: The 5-Minute Spoon Rescue
Start with a clean, dry utensil. Wash the spoon with warm water and mild soap, then towel-dry thoroughly. If the surface feels rough, briskly rub it with a clean tea towel to knock back raised fibres. For stubborn snags, a few light strokes with fine abrasive paper (320–400 grit) will level the grain. Never soak wooden spoons or run them through a dishwasher, as heat and prolonged moisture accelerate cracking.
Put a teaspoon of olive oil on a lint-free cloth and massage it along the spoon, following the grain from bowl to handle. Pay special attention to rims and edges where splinters begin. After 60–90 seconds, add a small top-up if the wood drinks it instantly. Buff firmly with a fresh section of cloth until the surface feels dry to the touch. Any residual greasiness invites dust, so finish with a decisive polish. Rest the spoon on a rack for a few minutes; it’s ready for service the same day.
Safety, Longevity, and When to Switch Oils
Olive oil is ideal for a rapid refresh, but it can develop a rancid odour over time in poorly ventilated drawers or when applied too heavily. If you notice a sticky feel or off smell, wash the spoon, let it dry fully, and buff hard; recoat lightly or move to a neutral food-grade mineral oil or a mineral oil–beeswax blend for longer protection. Use thin coats—multiple wisps beat one heavy slather. For nut-allergy households, avoid walnut oil finishes and opt for mineral or rice bran oil.
Durability depends on handling. Frequent heat, acidic foods, and aggressive scrubbing strip any oil film. Hand-wash promptly, dry immediately, and store with airflow around the utensils. Reapply a quick coat when the spoon looks dull or feels raspy; monthly is typical for busy kitchens. If a crack catches a nail, sand it smooth before re-oiling to stop the split from migrating. Over years, periodic deep maintenance with a wax blend will lock in the gains from your 5-minute fixes.
Quick Maintenance Schedule and Troubleshooting
Routine care keeps emergency fixes rare. Treat your spoons on a rhythm—light top-ups after heavy cooking weeks and deeper attention when seasons change. A consistent, ultra-thin application prevents the grain from swelling and shrinking dramatically, which reduces stress lines. The aim is a supple surface that wipes clean and never snags on cloth or skin. If you see dark patches, that’s trapped moisture; clean, dry, and oil sparingly once the tone evens out.
Use this snapshot to decide the right move at a glance. The table shows typical symptoms, the quickest remedy, and the ideal product for each scenario. When in doubt, start with light sanding and a restrained coat; excess oil causes more problems than too little.
| Sign | Fast Action (≈5 min) | Best Product |
|---|---|---|
| Dry, scratchy feel | Buff with cloth, apply thin coat, polish dry | Olive oil for speed |
| Faint splinters on rim | Light sand (320–400 grit), oil, vigorous buff | Olive oil, then mineral oil next wash |
| Sticky or stale odour | Wash, dry fully, hard buff; re-oil lightly | Mineral oil + beeswax |
| Fine surface crack | Sand smooth edges, oil to stabilise | Mineral oil; wax for seal |
A humble spoon deserves care equal to the recipes it stirs. A 5-minute olive oil coating won’t turn back the clock, yet it delivers instant comfort, safer edges, and a resilient feel that stands up to daily cooking. Use thin coats, polish dry, and let airflow do the rest; when performance matters for the long haul, rotate in a mineral oil–beeswax session. Small, regular attentions always beat a single heavy treatment. Which utensil in your drawer is first in line for a swift revival—and how will you fold this speedy routine into your weekend cooking rhythm?
Did you like it?4.5/5 (28)