In a nutshell
- ✨ Baking soda brightens dingy grout fast by combining mild alkalinity and gentle abrasion, restoring visible colour in about 10 minutes.
- 🧪 The science: pH 8–9 helps neutralise acidic grime, micro‑abrasive crystals lift film, and buffering keeps cleaning power steady during contact.
- ⏱️ Method: mix 3:1 baking soda to warm water, apply, allow a 10‑minute dwell, light scrub, then rinse and dry; for stubborn stains, use hydrogen peroxide instead of water.
- ⚖️ Safer choice than bleach or harsh acids: low odour, material‑friendly, ideal for everyday soil; reserve stronger agents for targeted, patch‑tested jobs.
- 🛡️ Long‑term care: seal grout, ventilate, squeegee, and spot‑clean; a simple monthly cycle maintains brightness and protects cementitious and epoxy grout alike.
Grout turns dingy before you notice. Steam, soap scum, tracked-in grit — they creep into porous lines and mute the original shade. The fix sitting in most cupboards is quietly powerful: baking soda. When used as a quick paste and given a brief dwell time, it can restore grout colour in about ten minutes, no harsh fumes, no flaking sealers. The science is simple, the method simpler. This is a low-cost, low-risk clean that rewards consistency over brute force. Below, we unpack why sodium bicarbonate works so fast, how to apply it for best results, and what to try when stains refuse to budge.
The Chemistry Behind Baking Soda’s Rapid Grout Revival
Grout is porous. It absorbs everyday soils that lean acidic: food splashes, body oils, tracked-in rain. Baking soda (sodium bicarbonate) is a mild alkali, typically around pH 8–9 in solution, which helps neutralise and loosen these deposits. That slight alkalinity matters. It encourages light saponification of fatty acids into soap-like residues that rinse away, and it destabilises biofilms so they scrub off with less effort. A gentle pH shift does the heavy lifting while protecting the grout matrix.
There’s also a mechanical trick at play. Dry bicarbonate forms fine, soft crystals that act as a micro‑abrasive. They scour the top microlayer of grime without gouging cementitious grout. Add warm water and you create a thixotropic paste: it clings to vertical lines instead of running off, allowing a reliable 10‑minute dwell. During this window, soils swell and release, and odour-causing compounds are buffered. Crucially, baking soda’s buffering capacity means it maintains a useful pH even when it meets acidic dirt, so performance doesn’t collapse on contact. This is why results arrive quickly and predictably, especially on light-coloured grout that’s dulled rather than deeply stained.
10-Minute Method: From Dull to Bright
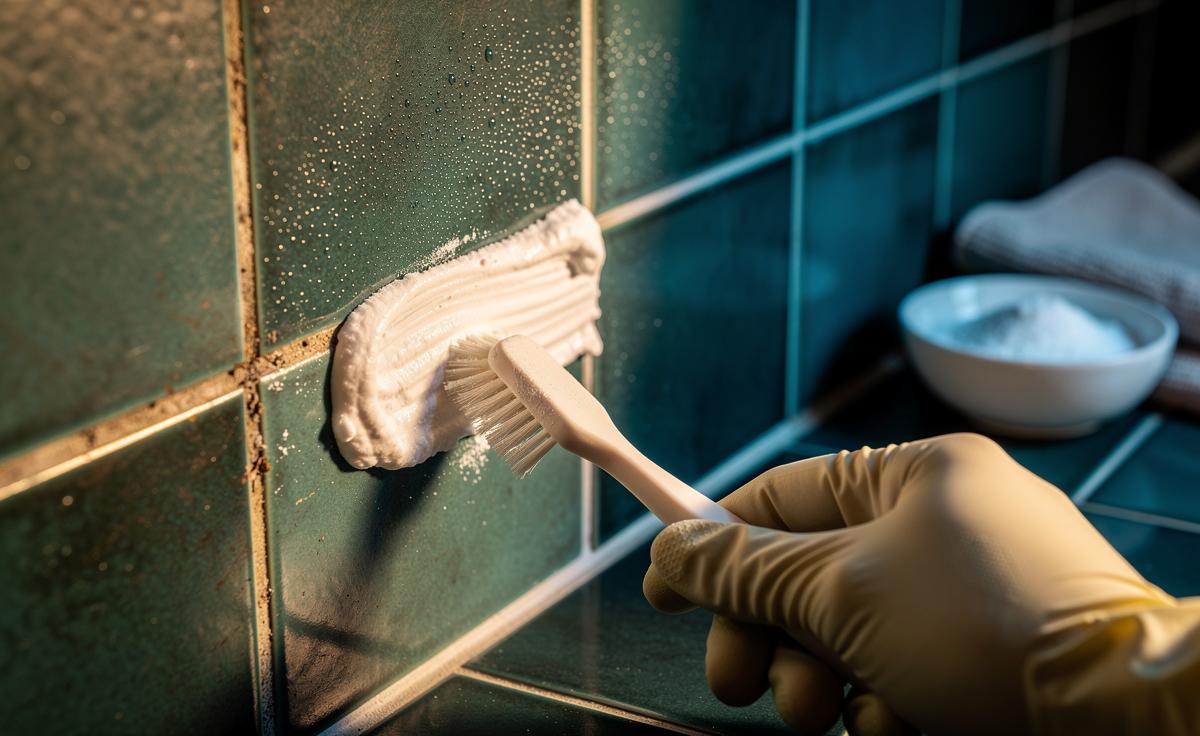
Start clean to clean well. Vacuum or sweep the floor, then wipe tile faces with a damp microfibre cloth to stop grit scratching the glaze during scrubbing. Mix a paste: three parts baking soda to one part warm water. Aim for yoghurt-thick. For splash-prone bathrooms, a drop of washing-up liquid adds glide without killing the alkalinity. Thicker paste means longer contact; runny paste won’t dwell.
Apply the paste along grout lines with a spoon, finger in a glove, or an old toothbrush. Set a timer for 10 minutes. This is your dwell phase: the paste clings, softening film and neutralising acidic grime. When the timer pings, agitate lightly with a soft brush, working in short back-and-forth strokes. Don’t attack; let the paste do the work. Wipe away slurry with a damp microfibre cloth, rinse the cloth frequently, then finish with a clean water wipe to remove residue. Dry with a towel to reveal the true colour. For stubborn corners on light grout, you can remix the paste using 3% hydrogen peroxide instead of water, then repeat the 10-minute routine. Never chase speed by mixing acids like vinegar into the paste — you’ll neutralise the cleaner and lose effectiveness.
How It Compares With Bleach and Acids
Many cleaners promise “instant” white grout. Some deliver at a cost. Chlorine bleach can brighten quickly by oxidising stains, but it leaves lingering odour, may corrode nearby metals, and can roughen unsealed cementitious grout with repeated use. Acidic limescale removers strip mineral film, yet they also attack the alkaline grout binder, risking etching and colour loss. Baking soda occupies a safe middle ground: effective on daily soils, gentle on materials, and kinder to indoor air. The goal is recovery without collateral damage.
| Cleaner | How It Works | Pros | Cons | Best For |
|---|---|---|---|---|
| Baking soda paste | Mild alkali + micro‑abrasion | Safe, cheap, low odour | Won’t lift deep dye stains | Everyday film, light discolouration |
| Chlorine bleach | Oxidises organic stains | Fast whitening | Irritating fumes, material stress | Mildew spots on light grout |
| Acidic removers | Dissolve mineral deposits | Great on limescale | Can etch cementitious grout | Hard-water crust on tiles |
| Oxygen bleach | Peroxide release in water | Colour-safe oxidiser | Needs longer dwell | Deep organic stains |
For most kitchens and baths, a regular bicarbonate routine keeps grout bright without resorting to harsher measures. Reserve oxidisers or acids for targeted jobs, patch-test first, and ventilate. Consistency beats intensity: little and often protects both grout and lungs.
Stain Triage and Long‑Term Care
Not every mark is equal. Tea, curry, and hair dye can penetrate and tint grout below the surface. After the standard 10-minute baking soda clean, escalate selectively: use a peroxide-based paste (3% hydrogen peroxide with bicarbonate) for organic colourants, allowing up to 15 minutes on light grout. For limescale halos, address mineral build-up on tile first, then return to the grout with the baking soda method. Match the chemistry to the stain, not the other way round.
Think prevention. Seal cementitious grout after a deep clean; modern penetrating sealers reduce absorption without changing the look. Keep a small baking soda jar and brush under the sink and spot-clean spills the day they happen. Ventilate bathrooms, squeegee shower walls, and dry floor grout after mopping to curb wicking and re-soiling. Epoxy grout? It resists stains better and usually needs only the bicarbonate wipe-down, not long dwells. Finally, avoid coloured scouring powders that can lodge in pores and tint lines. A simple monthly cycle — vacuum, bicarbonate paste, 10-minute dwell, light scrub, rinse, dry — preserves that crisp colour without drama. Small rituals deliver large, lasting gains.
Baking soda doesn’t just make cakes rise; it lifts the veil from grout with quiet efficiency. Its mild alkalinity, gentle abrasion, and clingy paste form a trio that cleans fast while protecting the very material you’re trying to save. Use it for routine refreshes, then call on targeted boosters only when stains demand it. Keep the air clear, the process simple, the results reliable. Ready to reclaim those lines and see your tiles pop — and what’s the first grout problem you’ll tackle with a 10-minute paste today?
Did you like it?4.4/5 (28)