In a nutshell
- 🧂 Salt acts as a gentle, mineral abrasive and slightly hygroscopic cleaner that loosens baked-on grease and grime; pair with heat and a little washing-up liquid, and use light pressure on non-stick and aluminium.
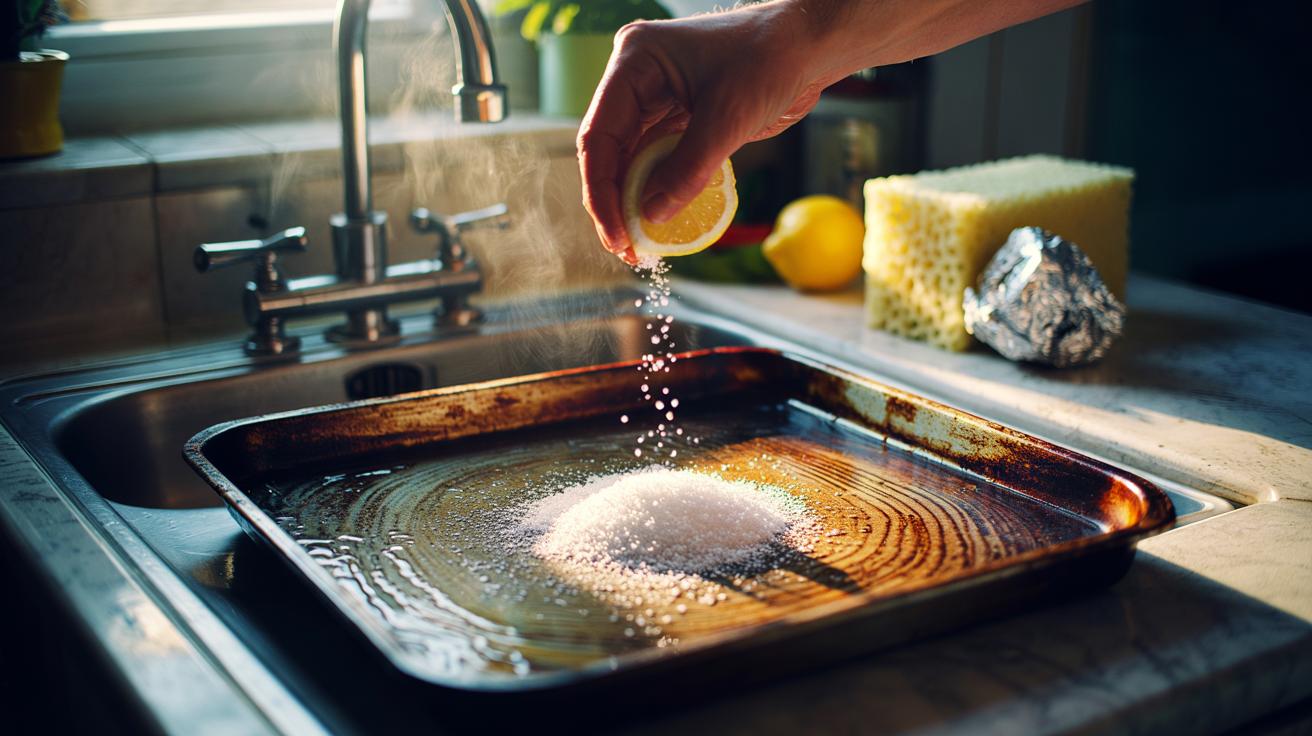
- 🔥 Step-by-step: warm the tray, leave it damp, sprinkle coarse sea salt, add drops of washing-up liquid and near-boiling water to form a paste, scrub with a non-scratch pad or foil (on bare metal), rinse hot, and dry thoroughly.
- 🧪 Tailor the method to material: use medium/coarse grains on stainless steel and enamel, fine salt on non-stick, gentle wet paste on aluminium; boosters like lemon/vinegar or bicarbonate of soda can help—never mix acids with chlorine cleaners.
- 🧩 Troubleshoot and prevent: apply a damp salt blanket for stubborn spots, work edges with a soft brush, deodorise with lemon; prevent buildup with parchment or a silicone mat, light pre-oiling, quick deglaze after cooking, and immediate drying (oil carbon steel lightly).
- ✅ Practical benefits: it’s eco-friendly, inexpensive, drain-safe, and offers tactile feedback so you stop before scratching—extending the life and look of your favourite baking trays.
There’s a quiet hero in your cupboard that cuts through burnt-on mess without fumes, faff, or pricey products: plain kitchen salt. When used correctly, salt delivers gentle abrasion, draws out moisture, and helps break the bond between grease, grime, and metal. It’s cheap, safe, and kind to drains. No special kit. No harsh smell. Just smart technique and a little elbow grease. In British kitchens, where well-loved baking trays handle roasts, chips, and traybakes, salt turns dread into a two-minute ritual. For most trays, salt is the quickest path from tacky residue to a clean, serviceable shine. Here’s how to make it work, and why it works so reliably.
Why Salt Works on Stubborn Grease
At its simplest, salt cleans because it’s a crystalline, mineral abrasive. The grains are hard enough to scuff away softened residues, yet not so aggressive that they strip sound metal or enamel when used with care. That micro-scrub action breaks the glaze of baked-on fat, letting warm water and a dash of washing-up liquid reach into the film and lift it. There’s also a physical nudge in your favour: salt is slightly hygroscopic, helping pull moisture into dry grime so it loosens faster under friction.
Heat matters. Warm a dirty tray first and you lower the viscosity of oils, letting salted slurry bite. Add a splash of acid—lemon juice or a touch of vinegar—and you improve emulsification and odour control. It’s a simple, elegant stack of effects rather than harsh chemistry. Do not bear down on non-stick coatings; keep pressure light and choose finer salt. On stainless steel and enamel, the method is forgiving; on aluminium, go gentle to avoid dulling the surface.
The upshot is consistency. Compared with creams or powders, salt gives tactile feedback—you feel resistance drop as deposits surrender. That immediate cue helps you stop at “clean” rather than grinding on and risking scratches.
Step-by-Step: The Salt Scrub Method
Start with the basics. Tap off crumbs. Run the tray under hot water to warm it. If it’s safe to handle, leave just a sheen of water; you want a damp surface, not a bath. Sprinkle a generous layer of coarse sea salt over greasy zones—about two tablespoons for a standard roasting tray. Add a few drops of washing-up liquid and a short splash of near-boiling water to make a gritty paste. Heat softens fats; salt then shears them away with minimal effort.
For scrubbing, use a non-scratch pad or a loosely crumpled ball of kitchen foil on bare metal. Work in small circles, refreshing salt as it dissolves. Stubborn corners? Park a mound of salt on the spot, drizzle lemon juice, and leave it hissing for two minutes before scrubbing again. Rinse hot, assess, and repeat lightly if needed. Finish with a regular soap wash to remove saline residue, then dry thoroughly to prevent spotting.
Safety and care count. Wear gloves if you have nicks or sensitive skin. Don’t attack painted trims or loose enamel. For non-stick trays, switch to fine table salt and very light strokes, stopping as soon as the tackiness disappears. A quick wipe of oil on carbon steel trays after drying helps resist rust and keeps future cleans easier.
Variations for Different Trays and Stains
Not all trays behave alike, so tweak your approach. On stainless steel, you can lean on coarse crystals for punctuation marks of caramelised fat. Enamel prefers medium pressure and shorter sessions—salt is safe, but chips aren’t. Aluminium cleans beautifully with salt, yet it marks if you overdo it; keep the paste wet and the scrub gentle. Seasoned carbon steel needs a lighter touch and minimal detergent to avoid stripping its protective layer. If sugar has burnt on, pre-soak in hot water first to soften the glassy crust, then switch to salt to finish.
| Salt Type | Abrasiveness | Best For | Avoid On |
|---|---|---|---|
| Fine table salt | Low | Non-stick coatings, light films | Very heavy carbon (too slow) |
| Sea salt (medium) | Medium | Stainless, enamel, general grime | Delicate decorative trims |
| Rock salt/coarse | High | Bare steel, stubborn corners | Non-stick, polished aluminium |
Choose your partner wisely, too. Lemon helps with odours and fatty films; a teaspoon of bicarbonate of soda blended into the salty paste boosts cut on rancid grease. Rinse well after any addition. Never mix acids with chlorine-based cleaners—keep it simple: salt, heat, and mild detergent do the heavy lifting. If patina matters, as with carbon steel, stop early and finish with hot water, a wipe of oil, and a low oven dry to reset the surface.
Troubleshooting and Prevention Tips
If patches persist after the first pass, don’t escalate force—extend contact. Lay a damp salt blanket over the spot, add a little washing-up liquid, and let it sit for five minutes before a second light scrub. For edges and rolled lips, pack salt into the groove with a soft brush, then rinse through with boiling water from a kettle. When a tray smells “fishy” or stale, a final wipe with salt and lemon neutralises odours fast.
Stop grime before it starts. Line trays with parchment or a good silicone mat for sticky cooks. Pre-heat and pre-oil lightly to reduce sticking, especially with veg roasts. Deglaze hot trays with a splash of water the moment food comes off; what’s left becomes an easy rinse rather than a fossilised film. Dry immediately after washing—towel first, then air-dry upright. For carbon steel, add a pea-sized dab of oil, spread thin, and warm briefly to maintain seasoning. Small, regular salt clean-ups beat rare, punishing scrubs—and keep trays service-ready.
Salt cleaning is old-school, but it feels modern: minimal waste, maximum control, reliable results. You’ll sense when the grains glide and know the job is done. That feedback loop saves time and protects your kit, whether you’re reviving a flea-market enamel roaster or maintaining a favourite weeknight sheet. Keep a jar of coarse salt beside the sink, and the worst burnt-on bits lose their power to intimidate. Ready to try the method on tonight’s tray—and which tweak will you test first, lemon zest lift or a gentler fine-salt polish?
Did you like it?4.6/5 (23)