In a nutshell
- 🧽 A fast, five-minute routine: spray a 1:1 mix of warm white vinegar and water, let it dwell, wipe in “S” strokes, then rinse and dry for a streak-free gleam.
- 🔬 The science: acetic acid breaks the mineral–soap bond; a drop of washing-up liquid improves wetting, and warm solution speeds penetration, so you scrub less.
- 🧰 Tools and ratios: use a microfibre cloth, non-scratch pad, or nylon brush; go 2:1 for stubborn patches; add a pinch of bicarbonate for gentle abrasion if needed.
- ⚠️ Safety first: suitable for ceramic and porcelain, but avoid natural stone; test sealed grout, and never mix vinegar with bleach; rinse chrome promptly and dry.
- 🌬️ Smart maintenance: keep a ready spray, mist after steamy showers, and buff dry to prevent spots—consistent quick cleans slow future build-up and save time.
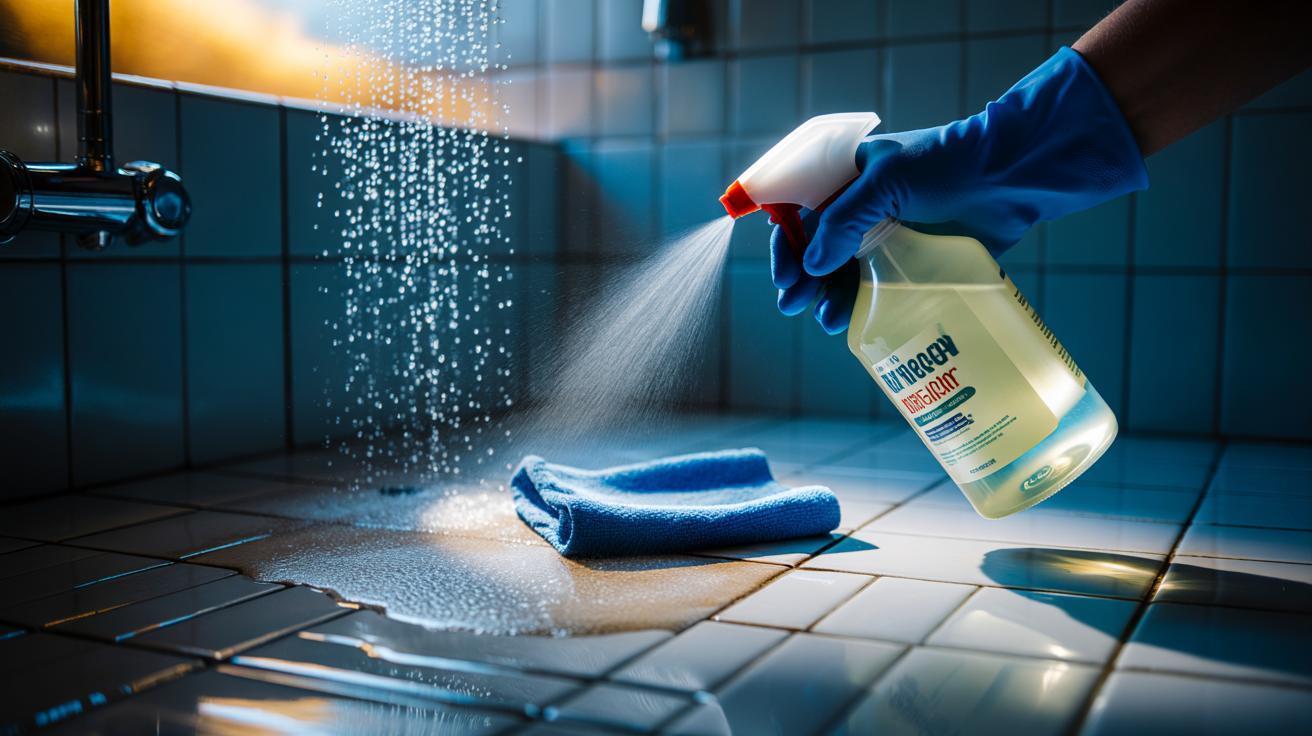
If soap scum has turned your tiles hazy and dull, there’s a quick, thrifty answer already in the cupboard: white vinegar. In the time it takes the kettle to boil, you can strip away that chalky film and bring back a glossy finish. This isn’t a marathon scrub. It’s a focused, five-minute routine grounded in chemistry and smart technique. Time matters; dwell, wipe, rinse, done. Armed with a spray bottle, a microfibre cloth, and a splash of vinegar, you’ll slice through residue, neutralise odours, and leave grout lines sharper. No fuss. No harsh fumes. Just efficient cleaning that works.
Why Vinegar Works on Soap Scum
Soap scum is a stubborn blend of fatty soap residues and hard water minerals such as calcium and magnesium. The film hardens and clings, especially on slightly textured ceramic tiles and grout. Enter acetic acid, the active component in white vinegar. It’s mild, but it’s mighty. Acetic acid breaks the bond between minerals and soap, softening the crust so a cloth can lift it in seconds. This is targeted chemistry, not brute force. You don’t need endless scrubbing; you need the right reaction.
Heat amplifies the effect. Warm vinegar penetrates faster, loosening residue in tight corners and around fittings. Add one drop of washing-up liquid to reduce surface tension and help the solution wet the tile evenly. That’s the secret to streak-free speed. A final rinse removes loosened particles, while a dry buff restores shine. Keep it simple: spray, dwell, wipe, rinse, dry. Used regularly, vinegar disrupts the scum cycle, so build-up slows and cleaning times shrink.
Five-Minute Tile Rescue: Step-by-Step
0:00–1:00 Fill a spray bottle with a 1:1 mix of warm white vinegar and water. Add a small drop of washing-up liquid. Shake. Lightly mist tiles from top to bottom so gravity carries the solution down. Don’t soak the grout; just a fine sheen. Set a five-minute timer to stay sharp. Use this moment to move toothbrushes, razors, or bath toys out of splash range.
1:00–3:00 Let it dwell. This is the magic minute. The acid is loosening the mineral film while the surfactant helps it spread uniformly. Now wipe with a microfibre cloth, working in overlapping “S” strokes. Focus first on the splash zone—chest height to tap level—where scum concentrates. Light pressure beats frantic scrubbing. For edges, fold the cloth to a crisp corner and trace along grout lines.
3:00–4:00 Troublesome patches? Switch to a soft, non-scratch pad or a nylon brush. Short, controlled circles. If you see a cloudy patch persist, spritz again and count to ten. Don’t chase it raw; let chemistry finish the job. 4:00–5:00 Rinse with a quick warm-water splash or a damp cloth, then buff dry with a fresh towel. Drying now prevents new spots and gives that hotel-bathroom gleam.
Tools, Ratios, and Quick Variations
Preparation trims minutes off maintenance. Keep a compact caddy beside the shower: small spray, folded microfibre, non-scratch pad. That’s your daily insurance policy. For typical scum, a 1:1 vinegar-to-water mix is the sweet spot—fast yet gentle. Heavier build-up? Go stronger briefly, then rinse well. Add a teaspoon of bicarbonate of soda on a damp cloth for a mild abrasive boost, but avoid grinding it into soft grout. The lighter the touch, the faster the shine.
| Purpose | Mix/Tool | Notes |
|---|---|---|
| Everyday clean | 1:1 warm vinegar + water | Fast, low odour after rinse |
| Stubborn patches | 2:1 vinegar + water or warmed vinegar | Short dwell, then rinse thoroughly |
| Edge detailing | Microfibre corner or nylon brush | Gentle pressure on grout lines |
| Extra bite | Pinch of bicarbonate of soda | Spot-treat, avoid natural stone |
If you prefer a fresher scent, drop in two or three peels of lemon or a single drop of essential oil into the bottle. Shake before use. Scent is optional; the acid does the work. Store the bottle clearly labelled and out of children’s reach, ready for a quick midweek mist.
Safety, Surfaces, and Smell Control
Vinegar is safe on most ceramic and porcelain tiles, but it’s a no-go on natural stone—marble, limestone, travertine—because acids etch and dull the finish. If your bathroom includes stone accents or a stone threshold, protect them with a towel barrier. Check manufacturer guidance for sealed grout; test an inconspicuous spot if uncertain. Never mix vinegar with bleach or products containing chlorine. That’s non-negotiable.
Worried about chrome or stainless fittings? Vinegar is fine for brief contact—just rinse and dry to prevent spotting. Wear light gloves if you have sensitive skin. Crack a window or run the extractor to keep the tang short-lived. The smell vanishes fast after rinsing, especially if you buff dry. For rental flats with older grout, switch to a weaker 1:2 mix the first time to gauge reaction, then step up if needed. Smart caution protects surfaces and keeps your five-minute win repeatable.
A sparkling wall of tiles changes the whole room. The shower looks newer, the air feels fresher, and your routine shrinks to minutes. By leaning on the simple science of acetic acid and the precision of a set timer, you get clinical results without pricey sprays or sore arms. Keep the bottle handy, mist after steamy showers, and buff while the mirror clears. Consistency beats deep cleans that never happen. What tweaks will you try—warmer vinegar, a microfibre upgrade, or a lemon-scented mix—to make your five-minute clean even faster next week?
Did you like it?4.6/5 (21)