In a nutshell
- ✨ Why it works: Bicarbonate of soda is a mild alkali and non-scratching abrasive that lifts grime from porous grout without etching tiles; paste clings to lines, and you should avoid using vinegar at the same time to prevent neutralising.
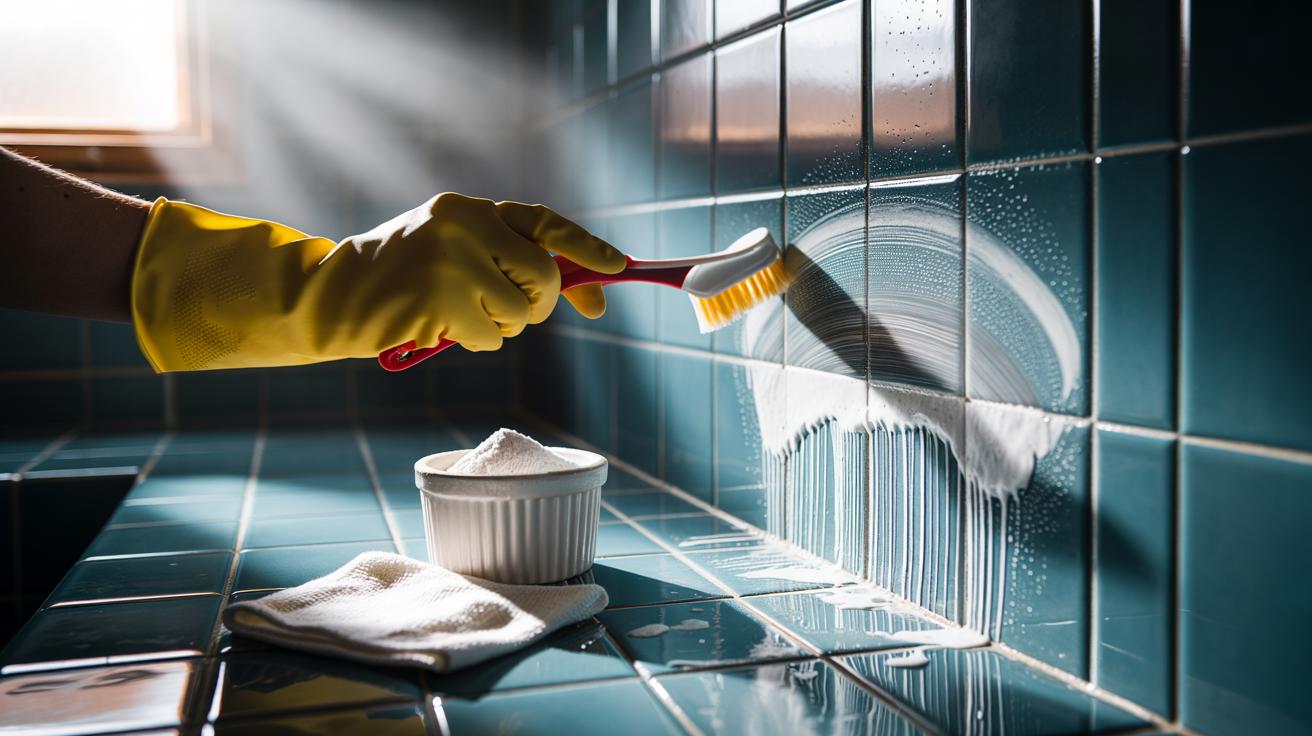
- ⏱️ The 10-minute method: Mix 3:1 bicarb to water (add a drop of washing-up liquid for grease), pre-wet grout, dwell 5–7 minutes, scrub lightly, wipe, rinse, and dry for visible brightness fast; always spot test first.
- 🧰 Tools and surfaces: Keep it simple—bicarb, water, brush, microfibres, gloves; adjust dwell and pressure for ceramic, porcelain, and sealed stone; avoid unsealed stone and do a second quick pass if haze remains.
- 🧼 Stubborn stains: For mould shadows use a 3% hydrogen peroxide paste; for limescale, rinse off bicarb then treat with diluted vinegar separately; for grease add detergent; never mix alkalis, acids, or bleach.
- ✅ Aftercare and payoff: Dry thoroughly, judge in natural light, then seal with a penetrating grout sealer; the method is low-cost, low-fume, renter-friendly, and repeatable.
British bathrooms and kitchen splashbacks have a common nemesis: dingy grout that makes even clean tiles look tired. The good news is surprisingly simple. With bicarbonate of soda and a few household tools, you can lift grey film, tackle light mould shadowing, and revive lines in a single tea break. No harsh fumes. No specialist kit. Just a gentle, effective method that respects surfaces and budgets. In many cases you’ll see a brighter, cleaner grout line in around 10 minutes, start to finish. Here’s how it works, why it works, and the precise steps to get consistently impressive results without creating new problems.
Why Baking Soda Works on Grout
Bicarbonate of soda is a mild alkali and a fine, non-scratching abrasive. That pairing matters. Grout is porous; it traps soap scum, oily residues, tracked-in dirt, and mould biofilms. The alkaline nature of bicarb helps break down acidic grime and body oils, while its tiny particles buff away surface staining without gouging the grout. Tiles stay safe, too, especially glazed ceramic and most porcelain. Used correctly, the paste lifts soil from the pores so it wipes away rather than being pushed deeper in.
The chemistry is quietly helpful. Mixed with water, bicarb forms a spreadable paste that clings to vertical joints and edges, extending contact time where dirt accumulates. It won’t bleach pigments or etch glazes, and it rinses cleanly. Pairing with a mild surfactant—one drop of washing-up liquid—improves wetting so the paste reaches micro-pits in the grout. You don’t need vinegar for routine brightening; save acids for limescale after you’ve rinsed the alkali away. This separation of steps prevents neutralising reactions that waste time and reduce cleaning power.
The 10-Minute Method, Step by Step
Clear the area. Sweep or vacuum gritty debris, then lightly mist the grout with warm water so the paste spreads evenly. Mix a paste: 3 parts bicarbonate of soda to 1 part water, plus a tiny drop of washing-up liquid if grease is present. Aim for peanut-butter thickness. Apply the paste along the grout lines with a gloved finger or small spatula. Set a timer for 5–7 minutes. Test a discreet spot first to confirm colourfastness and surface compatibility.
Scrub with a soft grout brush or an old toothbrush. Short, controlled strokes work best, especially along tile edges where shadowing persists. Don’t overdo it; grout can be softer than you think. Wipe away the slurry with a damp microfibre cloth. Rinse the cloth frequently so you’re removing soil, not relocating it. Finish by rinsing the area with clean water and drying with a towel to prevent residue lines. Ventilate the room or crack a window to speed drying. Most users will see a noticeable brightness jump by the time the timer rings.
Tools, Ratios, and Quick Checks
Keeping the kit simple helps you move quickly. You need: bicarbonate of soda, water, optional washing-up liquid, a mixing cup, gloves, a small brush, and two microfibre cloths (one for lift-off, one for final rinse). Where ratios and dwell times matter, a quick reference helps you avoid overworking delicate areas.
| Surface Type | Mix Ratio (Bicarb:Water) | Dwell Time | Scrub Tool | Notes |
|---|---|---|---|---|
| Glazed ceramic tiles | 3:1 | 5–7 min | Soft grout brush | Low risk; wipe edges clean to avoid haze |
| Porcelain tiles | 3:1 | 5–8 min | Toothbrush or detail brush | Rinse thoroughly; porcelain can hide residue |
| Sealed natural stone | 2.5:1 | 3–5 min | Very soft brush | Check seal condition first; avoid aggressive scrubbing |
| Unsealed stone | Not advised | — | — | Consult a stone specialist; risk of embedding residue |
How do you know it’s working? Look for a greyed paste turning slightly darker as it lifts soil, and a faint squeak when you glide a clean finger across rinsed grout. That squeak equals clean. If haze remains, a second quick pass is faster than scrubbing harder the first time.
Stubborn Stains and Safety Notes
Deeper discolouration can need a tweak. For mould shadows or tea/coffee spills on floor grout, swap water for 3% hydrogen peroxide in the paste, then dwell for 5 minutes before scrubbing. The gentle oxygen action brightens without bleach. For greasy kitchen joints, add a pea-sized dot of washing-up liquid to the standard paste and extend dwell by a minute. For limescale streaks near showers, first rinse away all bicarb, then treat scale separately with diluted white vinegar on the tile surface only, keeping acids off sensitive stone. Never overlap alkali and acid at the same time; work in stages for maximum effect.
Safety is simple but non-negotiable. Wear gloves to protect skin. Never mix bicarbonate of soda or peroxide pastes with bleach or bleach-based cleaners. Keep brushes low-abrasion to avoid gouging sanded grout. If grout crumbles under light pressure, stop and seek repair—cleaners can’t fix structural failure. Once dry and bright, consider a penetrating grout sealer to lock out stains and make future clean-ups faster. That small step can hold the win for months.
With a bowl of bicarbonate of soda, a brush, and 10 focused minutes, grout lines lose the grey cast that drags an entire room down. The method is quiet, inexpensive, and repeatable, which makes it ideal for busy households and rented flats alike. Keep the paste thick, keep the dwell short, and rinse until the cloth runs clean. Then dry, stand back, and judge in natural light. What’s the one area in your home where brighter grout would make the biggest visual difference—and what’s stopping you from trying it today?
Did you like it?4.6/5 (29)