In a nutshell
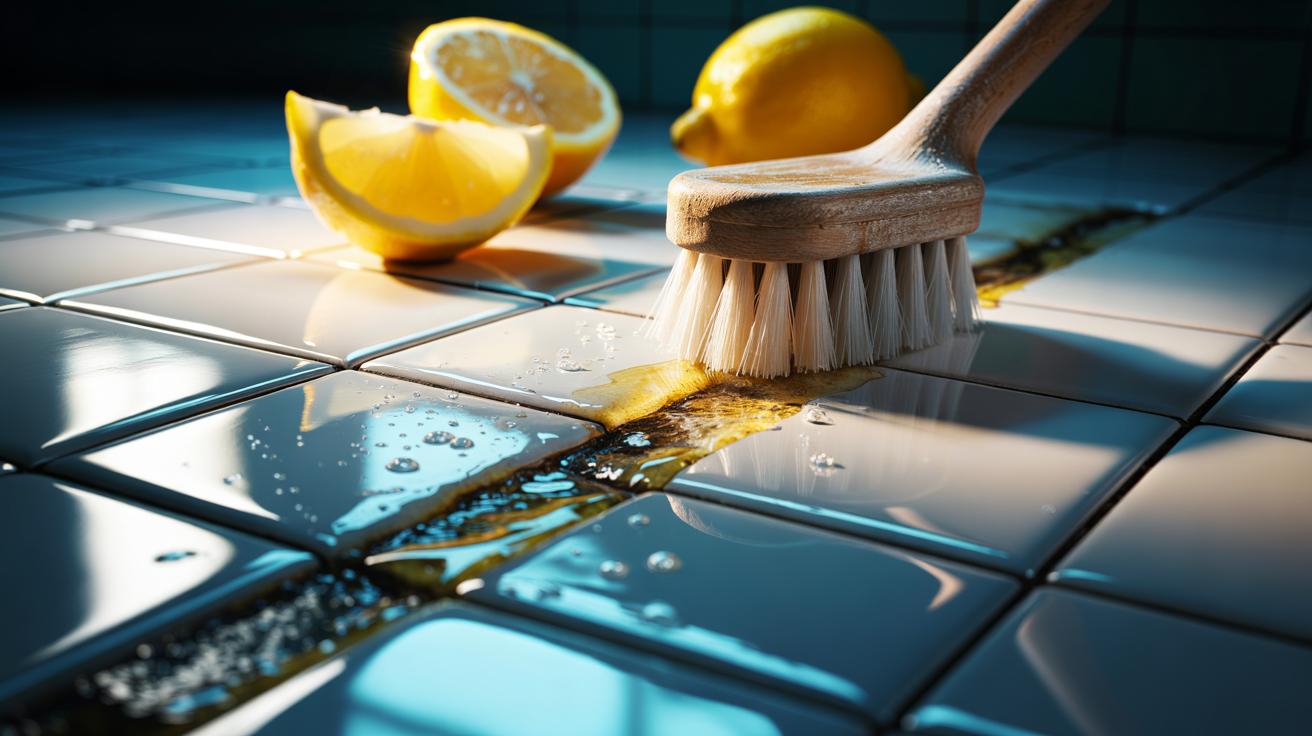
- ⏱️ Instant 60-second clean: Lemon juice lifts surface grime from grout fast, dissolving soap scum and mineral films for a quick, visible refresh.
- 🧪 Citric acid science: It chelates calcium/magnesium and helps emulsify light oils, loosening residue so it rinses away without heavy scrubbing.
- 🧼 Simple method: Use 2 parts fresh lemon to 1 part warm water (or neat on sealed grout), apply to lines, wait ~60 seconds, agitate with a soft brush, rinse and buff dry.
- ⚠️ Safety first: Avoid natural stone (marble, limestone, travertine), don’t let acid dry, test coloured grout, and do not mix with bleach; always rinse thoroughly.
- ✨ Boosters & aftercare: Add baking soda for gentle abrasion, use 3% hydrogen peroxide or oxygen bleach for stubborn stains, then seal grout to cut future cleaning time.
We all know the despair of dingy grout lines that seem to trap dirt no matter how much you scrub. Here’s the good news: a kitchen staple can reset those lines in the time it takes to boil a kettle. Pressed from citrus peel and pulp, lemon juice is a fast-acting, low-cost cleaner that cuts through soap scum, mineral haze, and cooking film. Citric acid in lemon juice dissolves residues without harsh fumes, leaving a bright, fresh finish. Used correctly, it can lift surface grime from grout in roughly one minute, giving you a practical, eco-conscious way to restore tiles between deeper cleans.
The Chemistry Behind Lemon’s One-Minute Clean
At the heart of lemon’s power is citric acid, a weak organic acid with a low pH that breaks bonds between grime and grout. It chelates calcium and magnesium, the minerals behind limescale and soap scum. By binding these ions, it loosens the film that clings to textured grout. Its light natural solvents also help emulsify kitchen greases, so soil rinses away instead of smearing. This is why a short “dwell time” delivers visible results without heavy scrubbing. On sealed grout, that 60-second window is often enough for a quick reset, especially in splash-back zones and shower surrounds.
Grout is porous, so anything that reduces surface tension matters. Lemon’s acidity slightly roughens the residue layer, allowing water to penetrate and lift the soil. Combined with agitation from a soft brush, this dislodges embedded particles without damaging the joint when handled properly. Fresh juice tends to outperform bottled versions, which may contain additives that reduce acidity. If your grout is heavily stained or unsealed, expect to repeat once or pair lemon with a mild abrasive for deeper restoration.
Step-by-Step Method for an Instant Grout Refresh
Start by vacuuming or wiping loose dust from the tile lines. Mix 2 parts fresh lemon juice with 1 part warm water if your grout is sensitive; use it neat for faster action on sealed joints. Apply with a spray bottle or a small squeeze bottle, targeting the lines, not the tiles. Let it sit for 60 seconds—no longer if you’re working near natural stone. Agitate with a soft grout brush in short, brisk strokes, then rinse thoroughly with clean water and buff dry with a microfiber cloth to prevent mineral spotting.
Repeat on stubborn areas, and finish by ventilating the room to dissipate vapours. For kitchens, follow with a damp wipe to remove any loosened grease film. Do not use wire brushes or harsh pads, which can erode grout. A quick patch test in an inconspicuous corner will show how your grout responds. Keep the mixture off marble, limestone, and travertine; acids etch these surfaces. If you have coloured grout, check for dye stability before full application.
| Item | Guideline |
|---|---|
| Fresh lemon juice | 2 parts (use neat for sealed grout) |
| Warm water | 1 part (optional dilution) |
| Dwell time | 60 seconds (up to 3 minutes on ceramic-only zones) |
| Tools | Soft grout brush, microfiber cloth, spray or squeeze bottle |
Safety, Suitability, and Common Pitfalls
Acids and natural stone do not mix. Never apply lemon juice to marble, limestone, or travertine; it can etch and dull the finish. On porcelain or ceramic with cementitious grout, lemon is generally safe if rinsed promptly. Sealed grout resists absorption and cleans faster; if yours is unsealed, limit dwell time and rinse well. Wear gloves if you have sensitive skin, and keep the area ventilated. Don’t let the solution dry on the surface, as dried acid can leave a faint bloom that needs additional rinsing.
Avoid pairing lemon with metal scourers that can rust and stain grout. Never mix lemon (or any acid) with bleach—this can release dangerous chlorine gas. Be cautious around coloured grout; some pigments can lighten if repeatedly exposed to acids. If your grout is cracking or sandy, skip aggressive brushing and focus on gentle agitation, then consider regrouting or sealing once clean. Finally, always follow with a clear water rinse to neutralise acidity and protect nearby fixtures.
When Lemon Isn’t Enough: Boosters and Alternatives
Stubborn staining from mould or set-in oils may need a companion product. For soap scum in showers, sprinkle baking soda onto damp grout and then apply lemon juice to create a fizzing paste—this adds mild abrasion while the acid dissolves minerals. For mildew shadows on light grout, 3% hydrogen peroxide can brighten after cleaning; apply, wait 5–10 minutes, then rinse. Use one method at a time—don’t layer acid and oxidisers together. In kitchens, a drop of mild washing-up liquid in your lemon mix improves grease lift.
Heavier restoration calls for an oxygen bleach cleaner (tile-safe) or a steam cleaner, especially in rental bathrooms where residue builds fast. If grout remains blotchy, it may be permanently discoloured; a colour-seal can restore uniformity and add future stain resistance. Once clean, sealing grout can halve your maintenance time and make that one-minute lemon refresh truly effortless. Keep a small bottle in your caddy for quick touch-ups after showers or spill clean-ups.
Lemon juice delivers a swift, inexpensive way to strip everyday grime from grout, exploiting citric acid’s ability to dissolve mineral films and emulsify light oils. Used with a soft brush and a strict 60-second dwell, it can revive lines between tiles without harsh chemicals. The key is thoughtful application: precise targeting, prompt rinsing, and respect for sensitive stone. If stains resist, pair lemon with baking soda or step up to oxygen-based cleaners, then protect the result with a quality sealer. Ready to try the one-minute refresh on your own tiles? Which room will you tackle first, and what tweak will you test to tailor the method to your surfaces?
Did you like it?4.5/5 (26)