In a nutshell
- ✨ Dryer sheets use a non-woven lattice and anti-static softeners to attract and trap glitter, with a lightly dampened sheet boosting pickup of ultra-fine shards.
- 🧽 Follow a step-by-step clean-up: calm airflow, mist the sheet, sweep from edges inward, fold to refresh surfaces, use a card-wrapped sheet for gaps, and finish fabrics with a HEPA vacuum.
- 🧰 Pick the right tool for the surface: dryer sheets for smooth areas, lint rollers for textiles, masking tape for seams, and vacuums for volume; a dryer-sheet pre-pass prevents spread.
- 🌱 Choose eco-savvy options: unscented or plant-based sheets, switch to biodegradable glitter, reuse sheets for dusting, and seal captured microplastics in the bin—never rinse away.
- ⏱️ Expect fast, scratch-free results: light pressure and a hint of moisture deliver clean surfaces in minutes; patch-test glossy finishes and remove any film with a damp cloth.
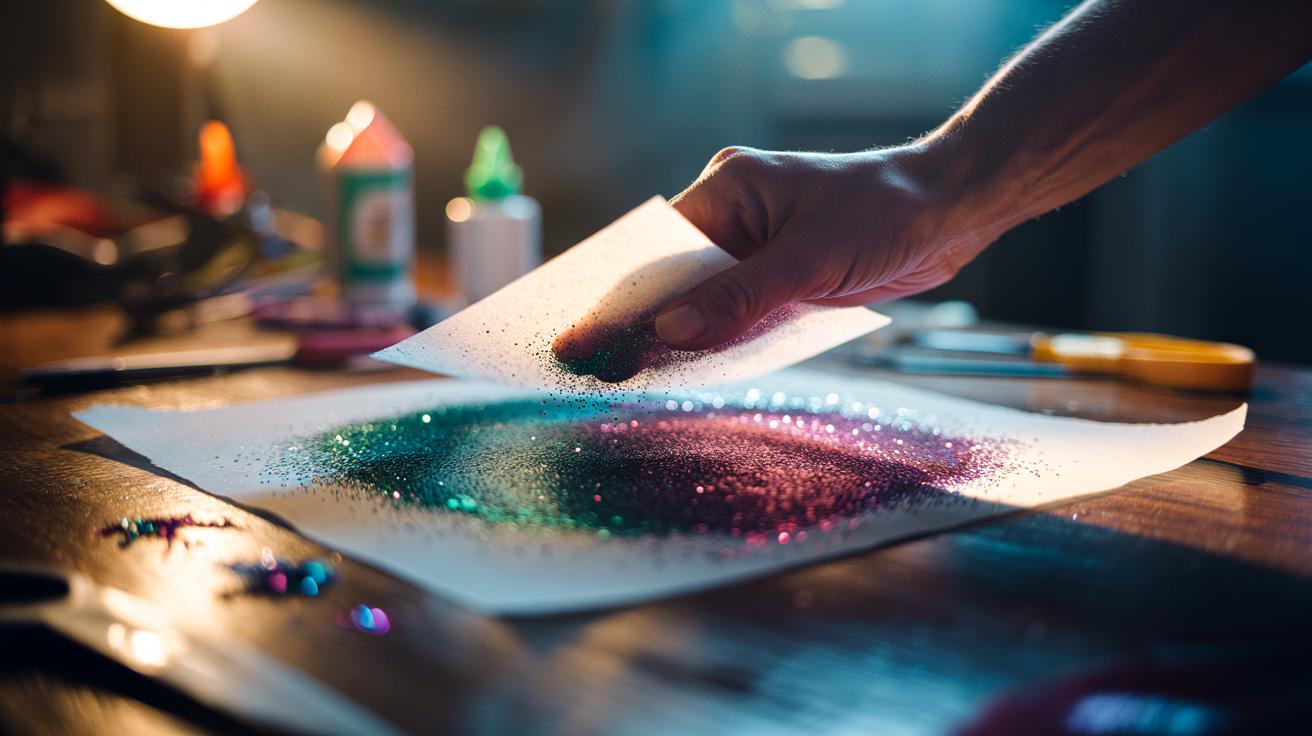
Glitter looks magical on cards and costumes, yet it becomes a domestic menace once it scatters across floors, jumpers, and worktops. Here’s the insider trick: tumble dryer sheets transform the dreaded clean-up into a swift, satisfying sweep. Their web of charged fibres corrals stray flecks without scratching or smearing glue residue. Lightly gliding a sheet across a surface draws particles into the mesh, leaving a tidy trail behind. Unlike dry paper towels that push glitter around, a dryer sheet grabs it, taming static and anchoring those tiny shards. Whether you’re tidying after a school craft or resetting a studio, this simple tool earns its place in the drawer next to scissors and tape.
How Dryer Sheet Fibres Capture Glitter Shards
At the heart of the trick is a blend of cationic softeners and a non-woven fibre lattice. Glitter carries and amplifies static; dryer sheets reduce charge while providing gentle adhesion. When you pass a sheet over a tabletop, a faint electrostatic attraction pulls metallic and plastic flecks towards the fibres. The lattice acts like a net, catching edges that ordinary cloths miss. A single sheet can lift hundreds of specks in seconds, particularly from smooth surfaces such as laminate, sealed wood, and glass.
The effect improves with a whisper of moisture. A lightly dampened sheet increases contact area and adds capillary pull, helping it trap ultra-fine glitter that defeats vacuum nozzles. Crucially, the sheet’s finish lowers friction, so particles slide into the mesh rather than skating away. That combination—reduced static, microtexture, and low drag—explains why dryer sheets outperform standard wipes. For delicate finishes, test in a corner; the sheet’s softeners can leave a faint film on high-gloss lacquer and some acrylics.
Step-by-Step: The Fastest Glitter Clean-up Routine
First, gather the right kit: one fresh or once-used dryer sheet, a small dustpan, and a bin liner. If the spill is heavy, switch off fans and close windows to calm air currents. Lightly mist the sheet with water—think two sprays, not a soak. Too wet and you will smear adhesive; barely damp and the fibres grip perfectly. Start from the outer edge of the spill and sweep inwards using broad arcs. Fold the sheet as you go to expose a clean quadrant, keeping the captured glitter inside.
For cracks, keyboards, or the seam between hob and counter, wrap the sheet around a bank card and draw it along the gap. On fabric seats or rugs, press the sheet flat and lift; follow with a HEPA vacuum if needed, using the upholstery tool to avoid embedding particles. Avoid hot surfaces, uncured varnish, and matte camera lenses. When you’re done, fold the sheet into a pouch so the microplastics remain contained before binning; do not rinse it down the sink.
When to Use Sheets vs Other Tools
Dryer sheets excel on smooth, static-prone surfaces and mixed spills after crafts. They are not a cure-all, though. Use them as your first pass, then choose the right follow-up tool based on the surface and volume. The comparison below helps you match the method to the mess, saving time and preventing scratches or spread.
| Tool | Best For | Pros | Cons |
|---|---|---|---|
| Dryer sheet | Tables, hard floors, lampshades | Controls static; quick; low scratch risk | May leave a light film on glossy finishes |
| Lint roller | Upholstery, clothing, curtains | Targeted pickup; easy on fabrics | Struggles in seams; refills add up |
| Masking tape loop | Corners, keyboard edges | Precise; disposable | Can tug fibres; wastes tape |
| HEPA vacuum | Carpets, rugs, big spills | Volume removal; filters fine dust | Residual sparkle often remains without a pre-pass |
| Microfibre cloth (damp) | Delicate finishes, screens | Gentle; washable | Less effective on staticky glitter |
For the least mess, lead with a dryer sheet, then finish with the specialist tool. This two-stage approach prevents chasing glitter round the room and cuts cleaning time dramatically.
Eco-savvy Choices and Reuse Ideas
Glitter often contains microplastics, so containment matters. Choose unscented or plant-based sheets if you’re fragrance-sensitive, and biodegradable glitter for future projects. You can extend a sheet’s life by repurposing it for dusting skirting boards, blinds, and the inside of drawers; the anti-static finish keeps fluff at bay. Used sheets still work brilliantly for light clean-ups, especially on monitor backs and TV stands where static attracts dust and sparkles alike.
Dispose of captured glitter in a sealed bag; never rinse it into sinks or drains. For a reusable option, a slightly damp microfibre cloth paired with a final pass of a used dryer sheet balances performance with waste reduction. Always patch-test on piano gloss, lacquered guitars, and acrylic display cases. If residue appears, a follow-up wipe with a clean, damp cloth removes the film without disturbing your tidy, glitter-free finish.
From children’s craft corners to photo studios, dryer sheets deliver a small miracle: glitter-free clean-ups in minutes, without harsh scrubbing or clouds of airborne sparkle. The fibre lattice captures shards, the anti-static chemistry calms the chaos, and a careful fold keeps everything contained. Apply the right pressure, add a hint of moisture, and let the mesh do the work. Once you’ve seen a single swipe leave a surface spotless, you won’t reach for paper towels again. How will you adapt this method in your own space—will it be your first pass after every project, or the secret weapon you deploy only for the sparkliest disasters?
Did you like it?4.4/5 (23)